
Getting Started
Welcome to WooCommerce MetaMask Payment Gateway – WordPress Plugin.
We would like to thank you for purchasing WooCommerce MetaMask Payment Gateway – WordPress Plugin.
We are very pleased that you have chosen WooCommerce MetaMask Payment Gateway – WordPress Plugin for your eCommerce website, you will be never disappointed!
Before you get started, please be sure to always check out this documentation. We outline all kinds of good information, and provide you with all the details you need to use WooCommerce MetaMask Payment Gateway – WordPress Plugin.
If you are unable to find your answer here in our documentation, we encourage you to contact us with your site Admin Access and CPanel or FTP details. We’re very happy to help you and you will get reply from us more faster than you expected.
Introduction
WooCommerce MetaMask Payment Gateway – WordPress Plugin – Accept Cryptocurrency.
WooCommerce MetaMask Payment Gateway – WordPress Plugin is for accepting cryptocurrency as payment. Plugin support ETH (Ethereum), BNB (Binance) and all custom coins(Contract, Token) which are based on ETH (Ethereum), BNB (Binance). There is no fee required to accept cryptocurrency.
Features
- Easy to install and manage yourself.
- Fast, Secure, and User friendly checkout process.
- 0% fee required to accept cryptocurrency.
- Environment mode supported testnet and mainnet.
- Support below default cryptocurrency :
- Ethereum (ETH)
- Binance (BNB)
- Polygon (MATIC)
- Avalanche (AVAX)
- All custom coin(Contract, Token) which based on ETH (Ethereum), BNB (Binance) supported.
- Ethereum based custom chain supported.
- Connect to MetaMask button on checkout page.
- Manage order status after payment successful.
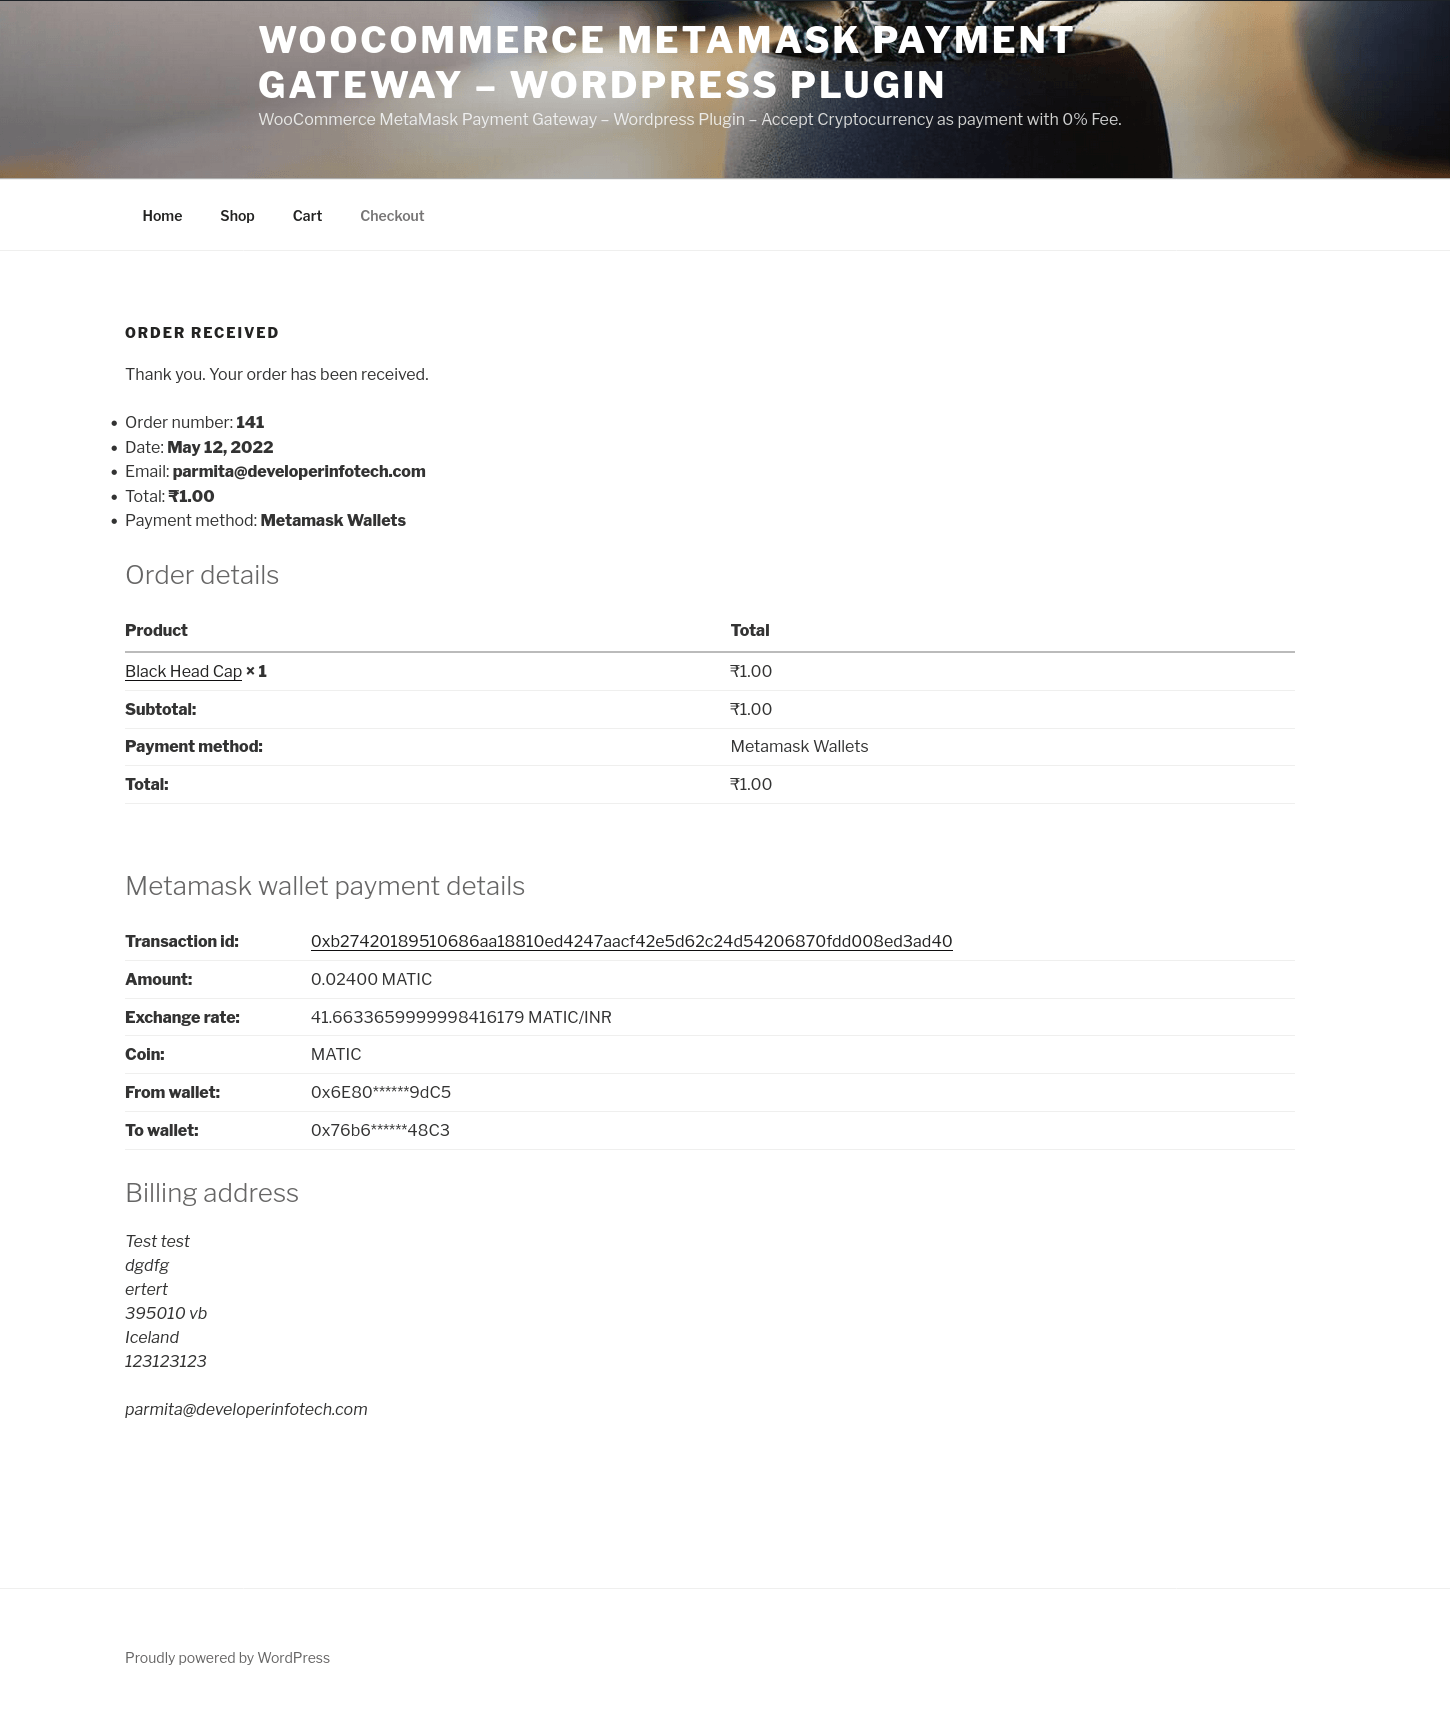
- Show transaction details on thank you page and order details page in admin panel.
Requirements
- Download and Install MetaMask Wallet into your browser (Merchant and Customer).
- MetaMask Wallet Address of merchant
- PHP 5.6 or greater. (You can see this under WooCommerce > Status).
- An SSL Certificate is to be installed on your site to ensure your customer’s details are safe.
- WooCommerce Plugin 4.0.0 or greater
- WordPress 5.0.0 or greater
- Require Transation Verify Url and ApiToken for Transaction Verification.
- Require Contact Token Address & Contract ABI Key for Custom Coins.
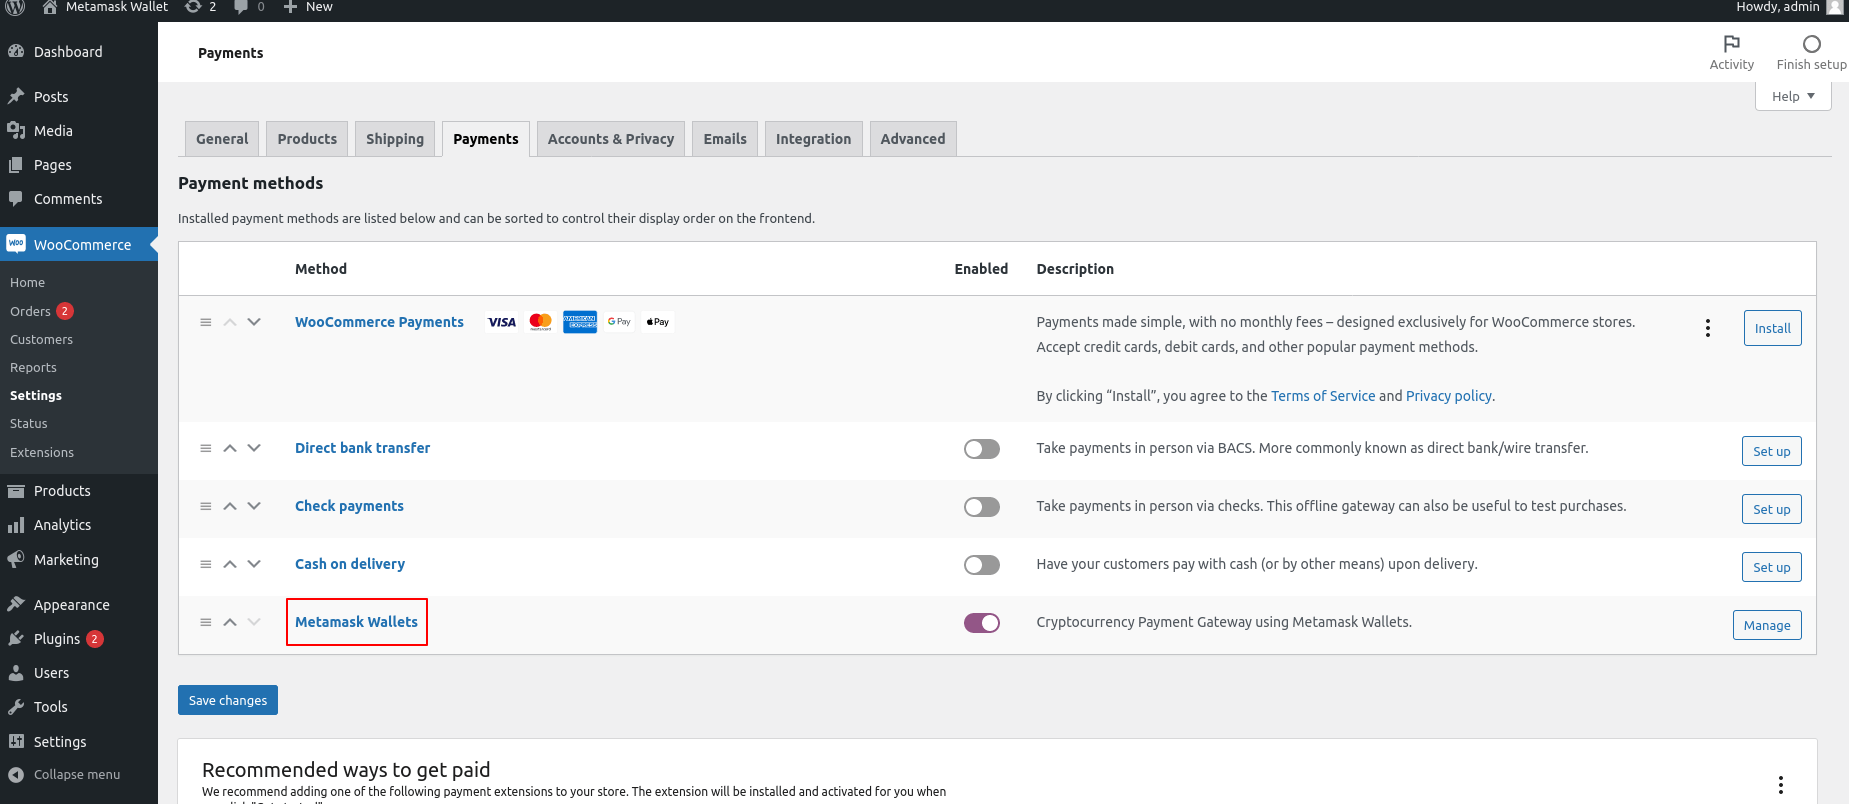
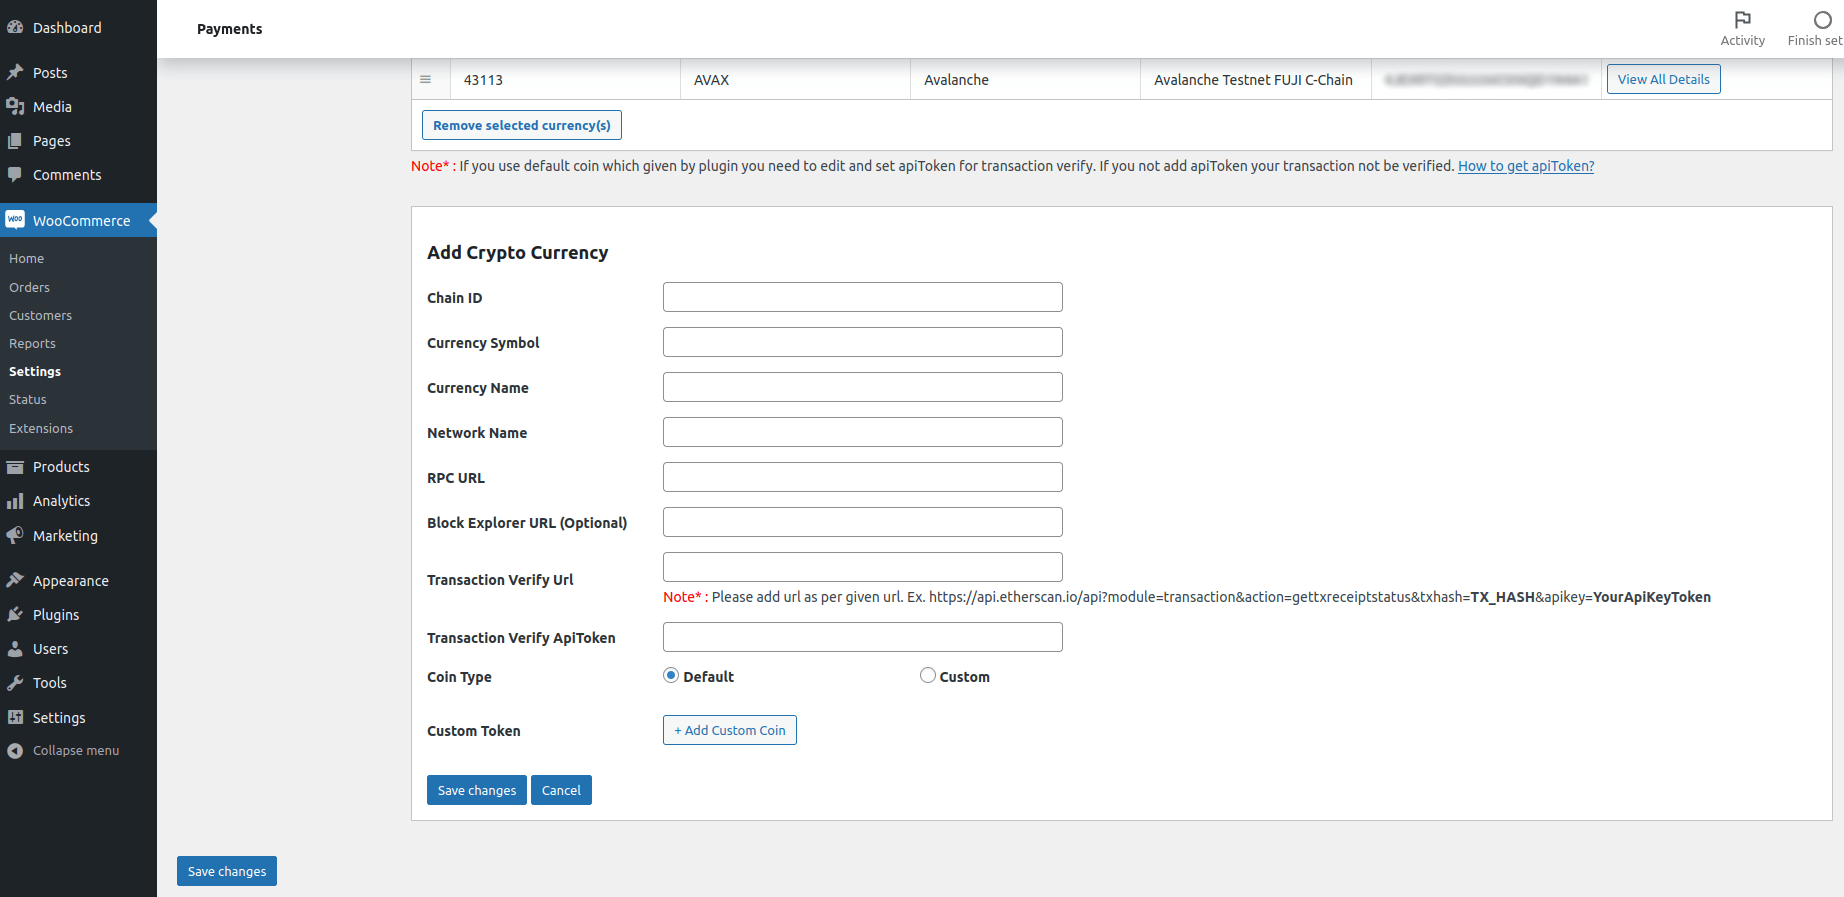
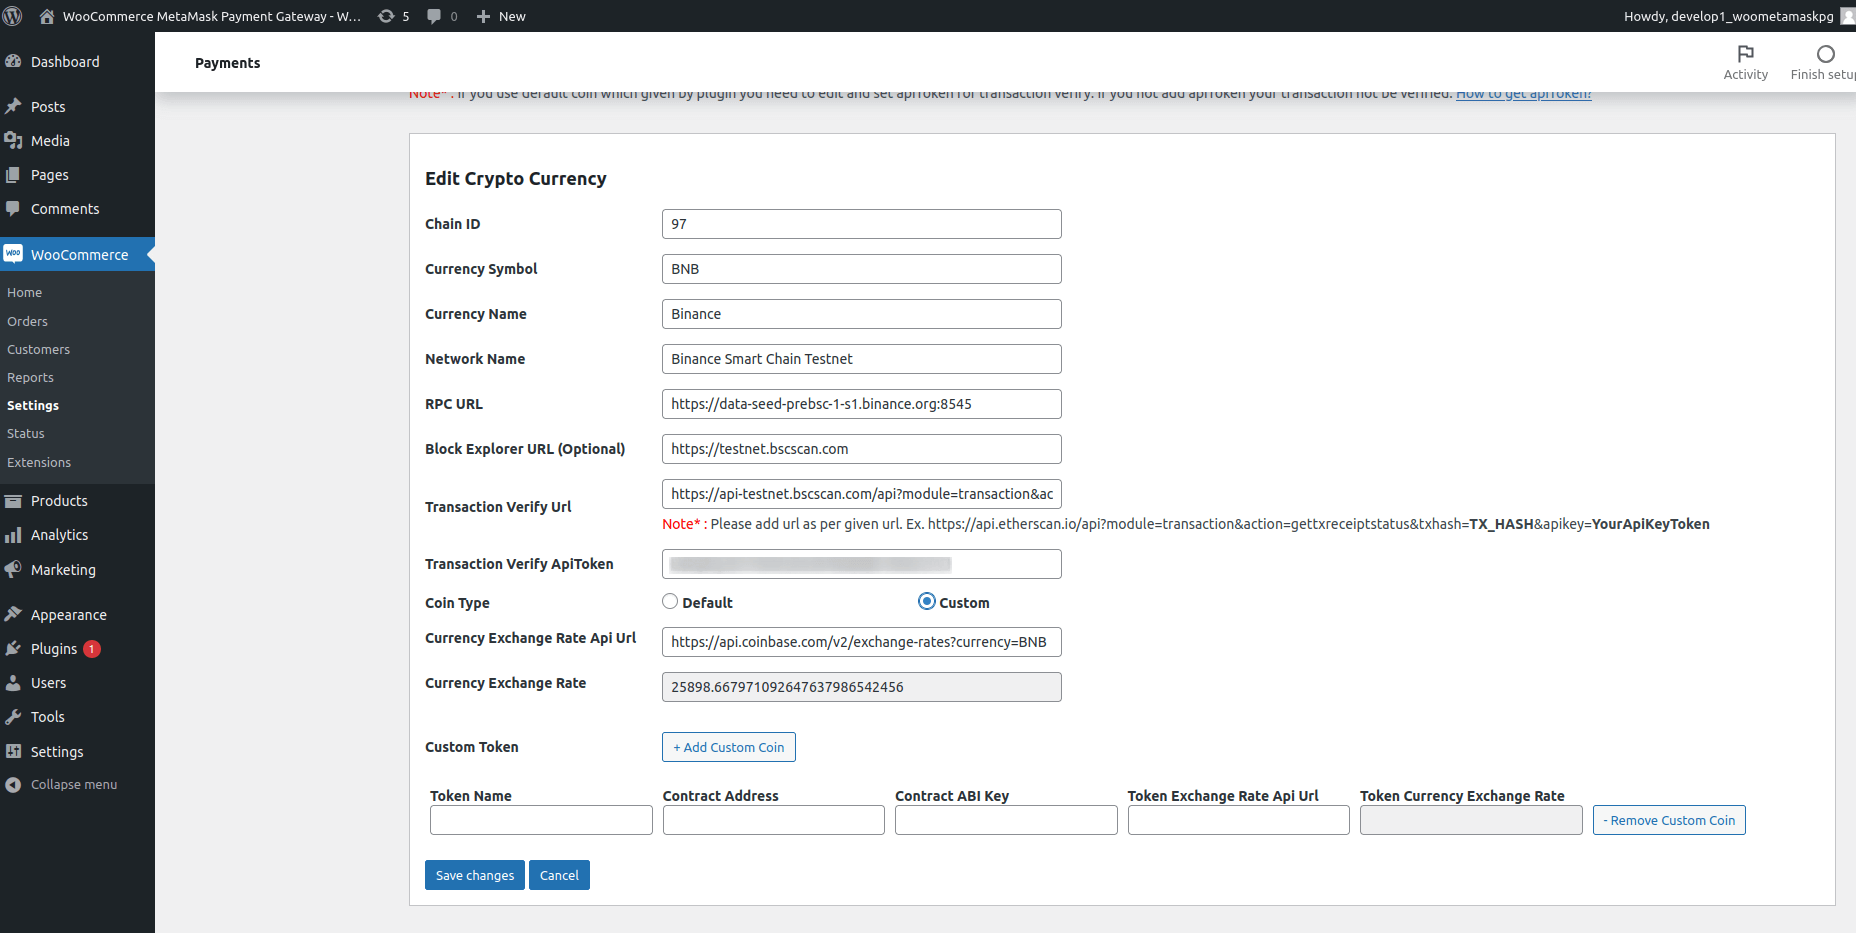
MetaMask Plugin Settings
The settings for the plugin are located under WooCommerce > Settings > Payments > Metamask Wallets.
- Enable / Disable – This will enable the gateway to be used by customers to checkout.
- Title – This is the text shown for the payment during checkout and on the Order Received page.
- Description – This is the text shown under the title during checkout.
- Wallet Address – MetaMask Merchant Wallet Address.
- Environment – This is control of transaction if test “TESTNET” or live “MAINNET” mode.
- Order Status – This is manage order status after order.
- Crypto Currency Details – This should changed based on Environment testnet or mainnet. Add chain details(Chain Id, Currency Symbol, Currency Name, Network Name, RPC URL and etc) and custom coins details(Token Name, Contract Address, Contract ABI Key).
Note* : If you use default coin which given by plugin you need to edit and set apiToken for transaction verify. If you not add apiToken your transaction not be verified and order status would be in pending payment even after payment.
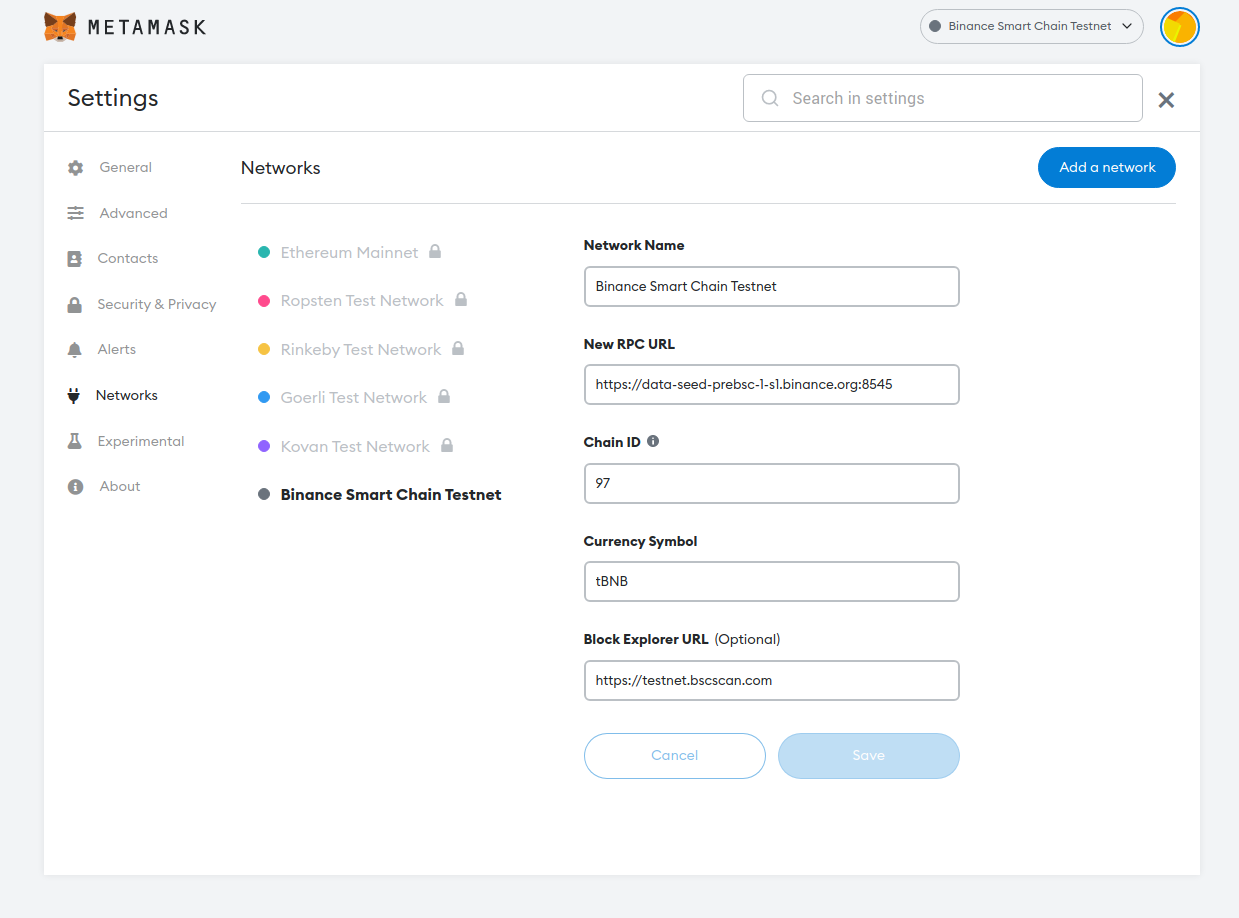
How to get network/chain details?
First you need to add network/chain to your metamask wallet after that you can see all details which required for payment gateway settings.
You can add network/chain manually or connect chain directly.
If network already added in your wallet then:
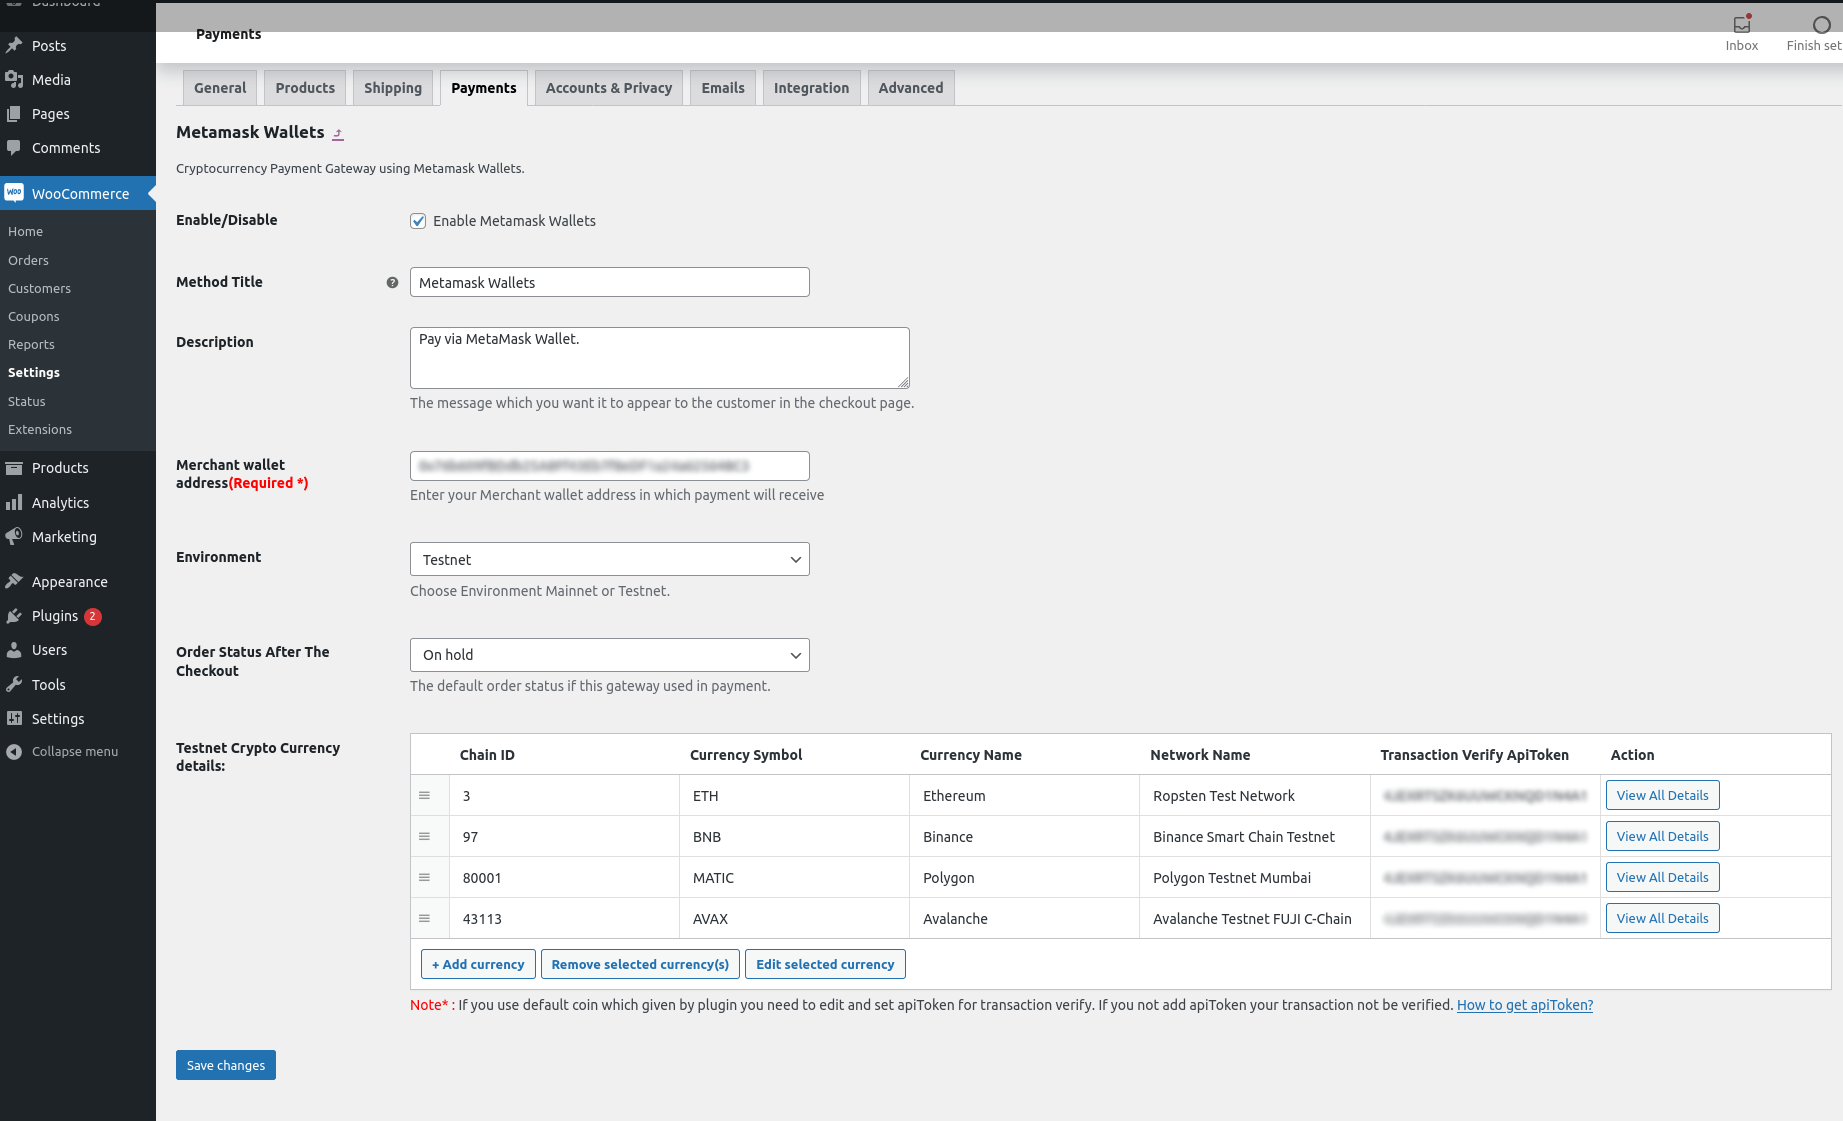
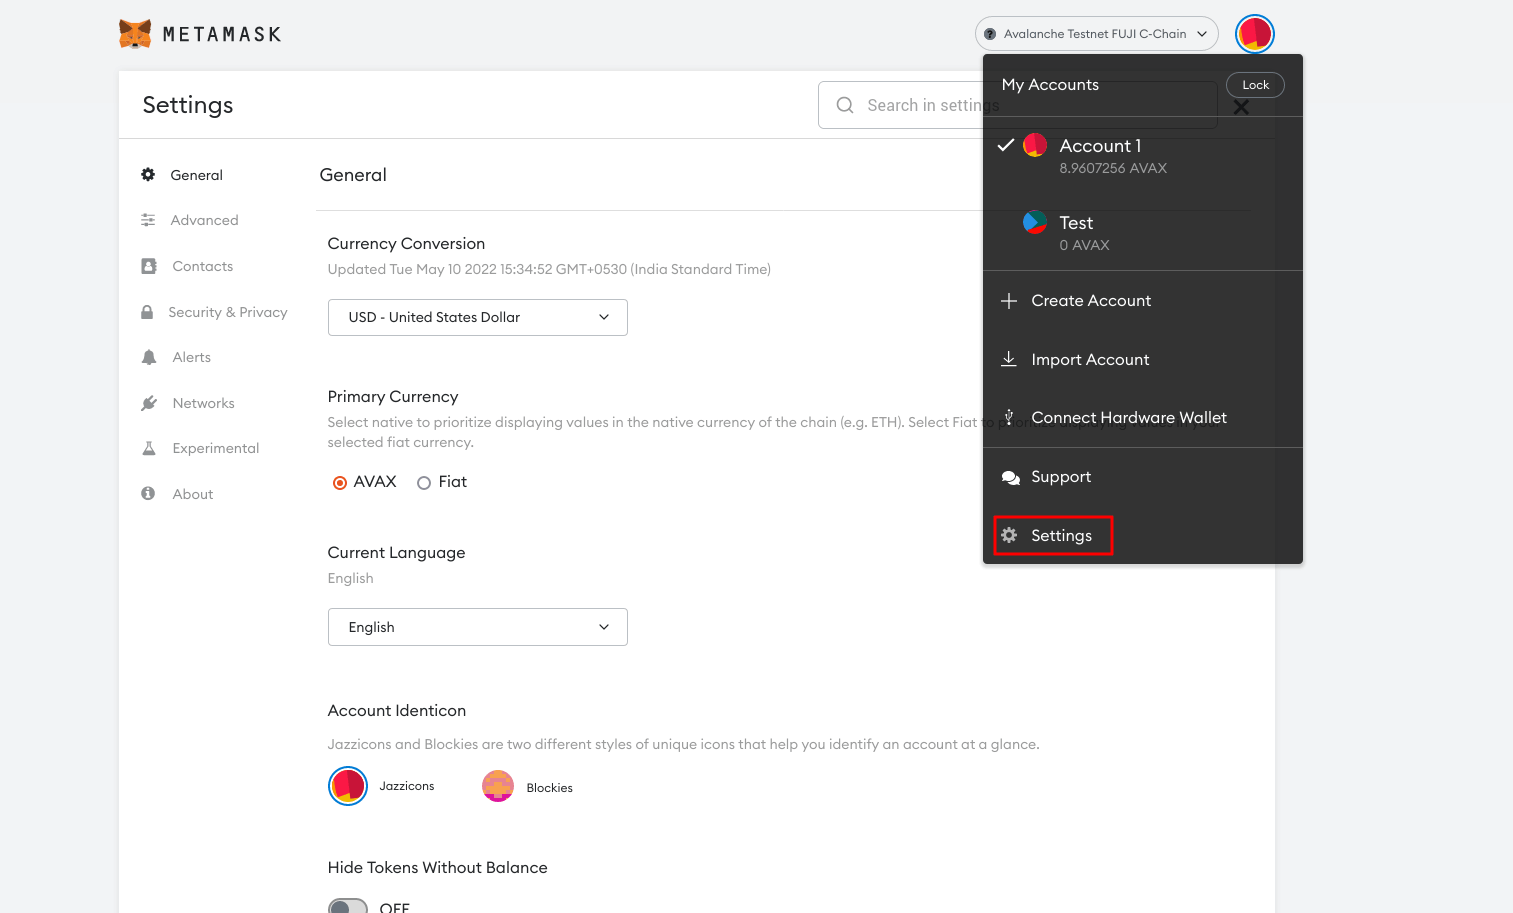
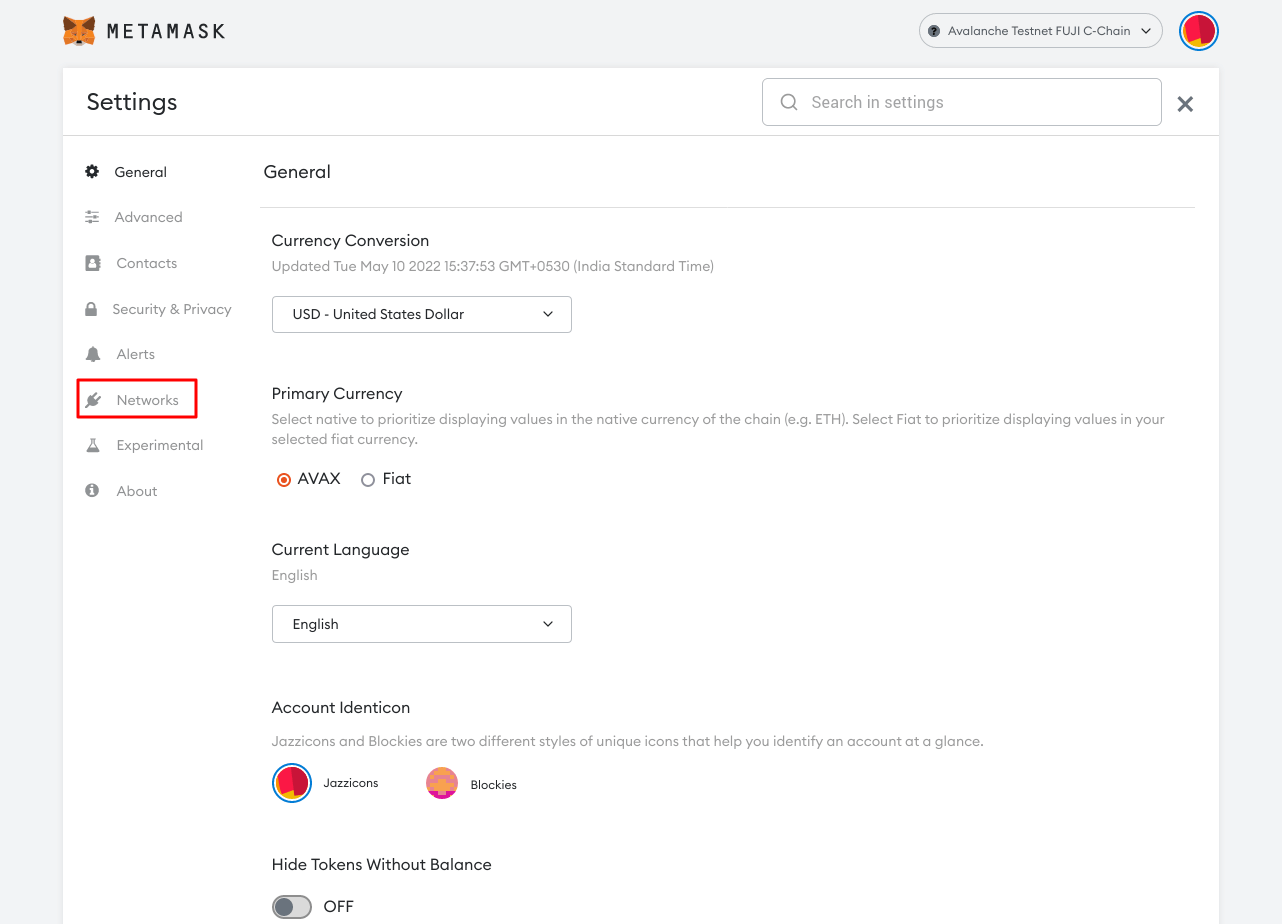
- Open MetaMask and select “Settings.” If you are using a browser extension, simply click the right upper corner (where the circle is).
- Once you are inside the Settings Page, find and select “Networks” menu.
- Then simply click on network which you want add in your eCommerce site.
- After click it will show network details:
- Network Name
- RPC URL
- Chain ID
- Symbol
- Block Explorer URL (Optional)
- Copy all details and paste it in paymet gateway setting.
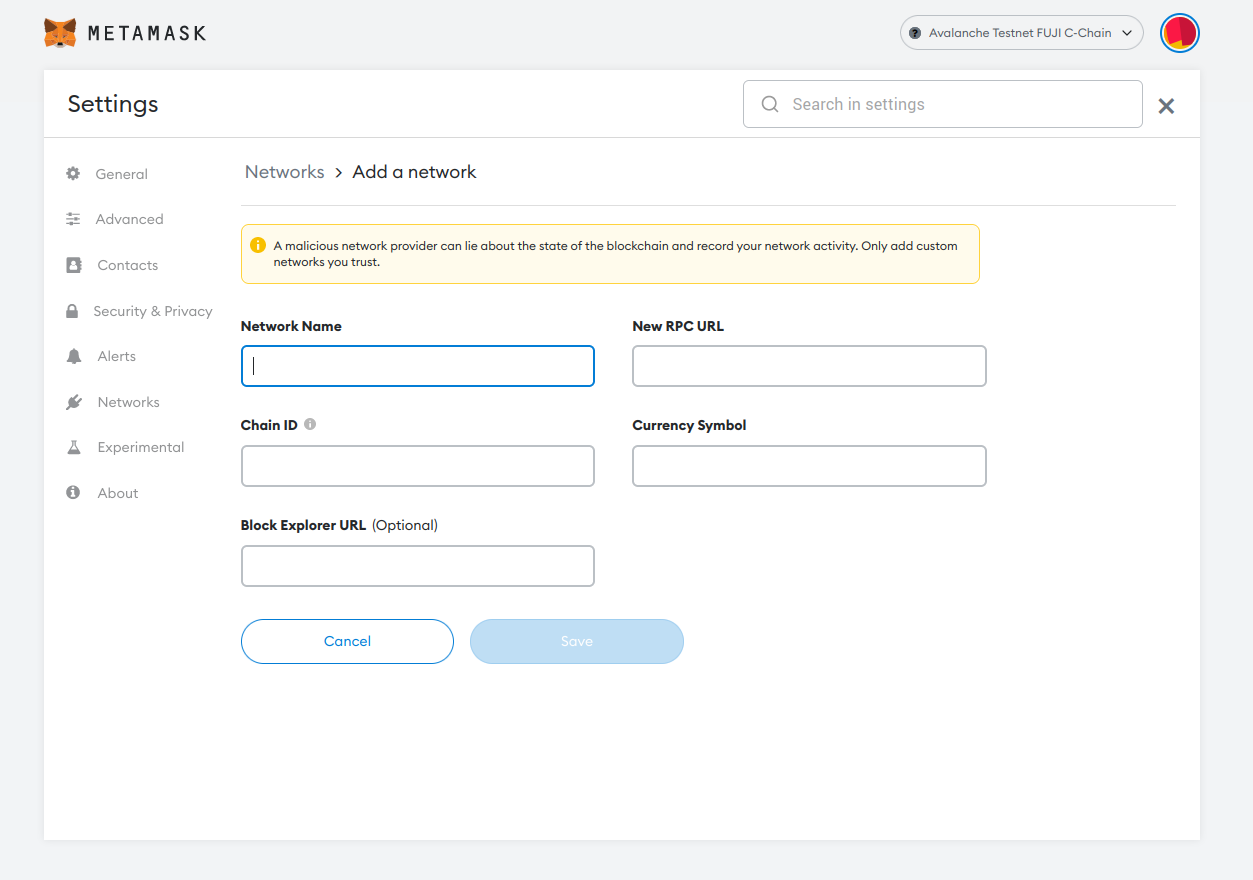
How add network/chain to your MetaMask wallet?
- Firstly, open MetaMask and select “Settings.” If you are using a browser extension, simply click the right upper corner (where the circle is).
- Once you are inside the Settings Page, find and select “Networks” menu.
- We are going to add two networks: the main and the test net. Click on “Add Network” and input these details:
- Network Name
- RPC URL
- Chain ID
- Symbol
- Block Explorer URL (Optional)
- Then save it.
How add Transaction Verify URL?
Please add url as per given url.
Ex. https://api.etherscan.io/api?module=transaction&action=gettxreceiptstatus&txhash=TX_HASH&apikey=YourApiKeyToken
In your transaction verify url two keywords required one TX_HASH and second one is YourApiKeyToken. TX_HASH will be replace with transaction id which is return by MetaMask when customer place order and YourApiKeyToken will be replace with Transaction ApiToken which is added by admin in payment gateway settings.
How to add custom token/assets?
- Go to WooCommerce > Settings -> Payments -> MetaMask Wallets.
- Click Add/Edit Chain in which you want to add custom token/assets.
- Click on Add custom coin button.
- Fill up field (Token Name, Contract Address, Contract ABI Key and Currency exchange API Url)
- And Save changes.
How to find contract ABI key?
- Go to explore url according to your chain.
- Add contract address and search.
- Click on contract tab.
- On contact tab, contact ABI key show.
- Copy contract ABI key and paste it into plugin settings.
How to add custom currency exchange rate?
- For chain network, select coin type custom and fill up currency exchange rate API URL with your API URL.
- For custom tokens, you can add currency exchange API URL token-wise.
Note: Please set your custom API URL response as given below example, Otherwise exchange rate does not work.
{ "data": { "currency": "BNB, "rates": { "USD" : "287.6910839699968582", "INR" : "25341.3655034393892", } } }
Testing Checkout/Payment
- Make sure you have MetaMask Web Wallet installed into your browser.
- Make sure you have enough balance in your MetaMask Wallet
- if your MetaMask Wallet is empty you can get a free crypto balance into the free faucet provider.
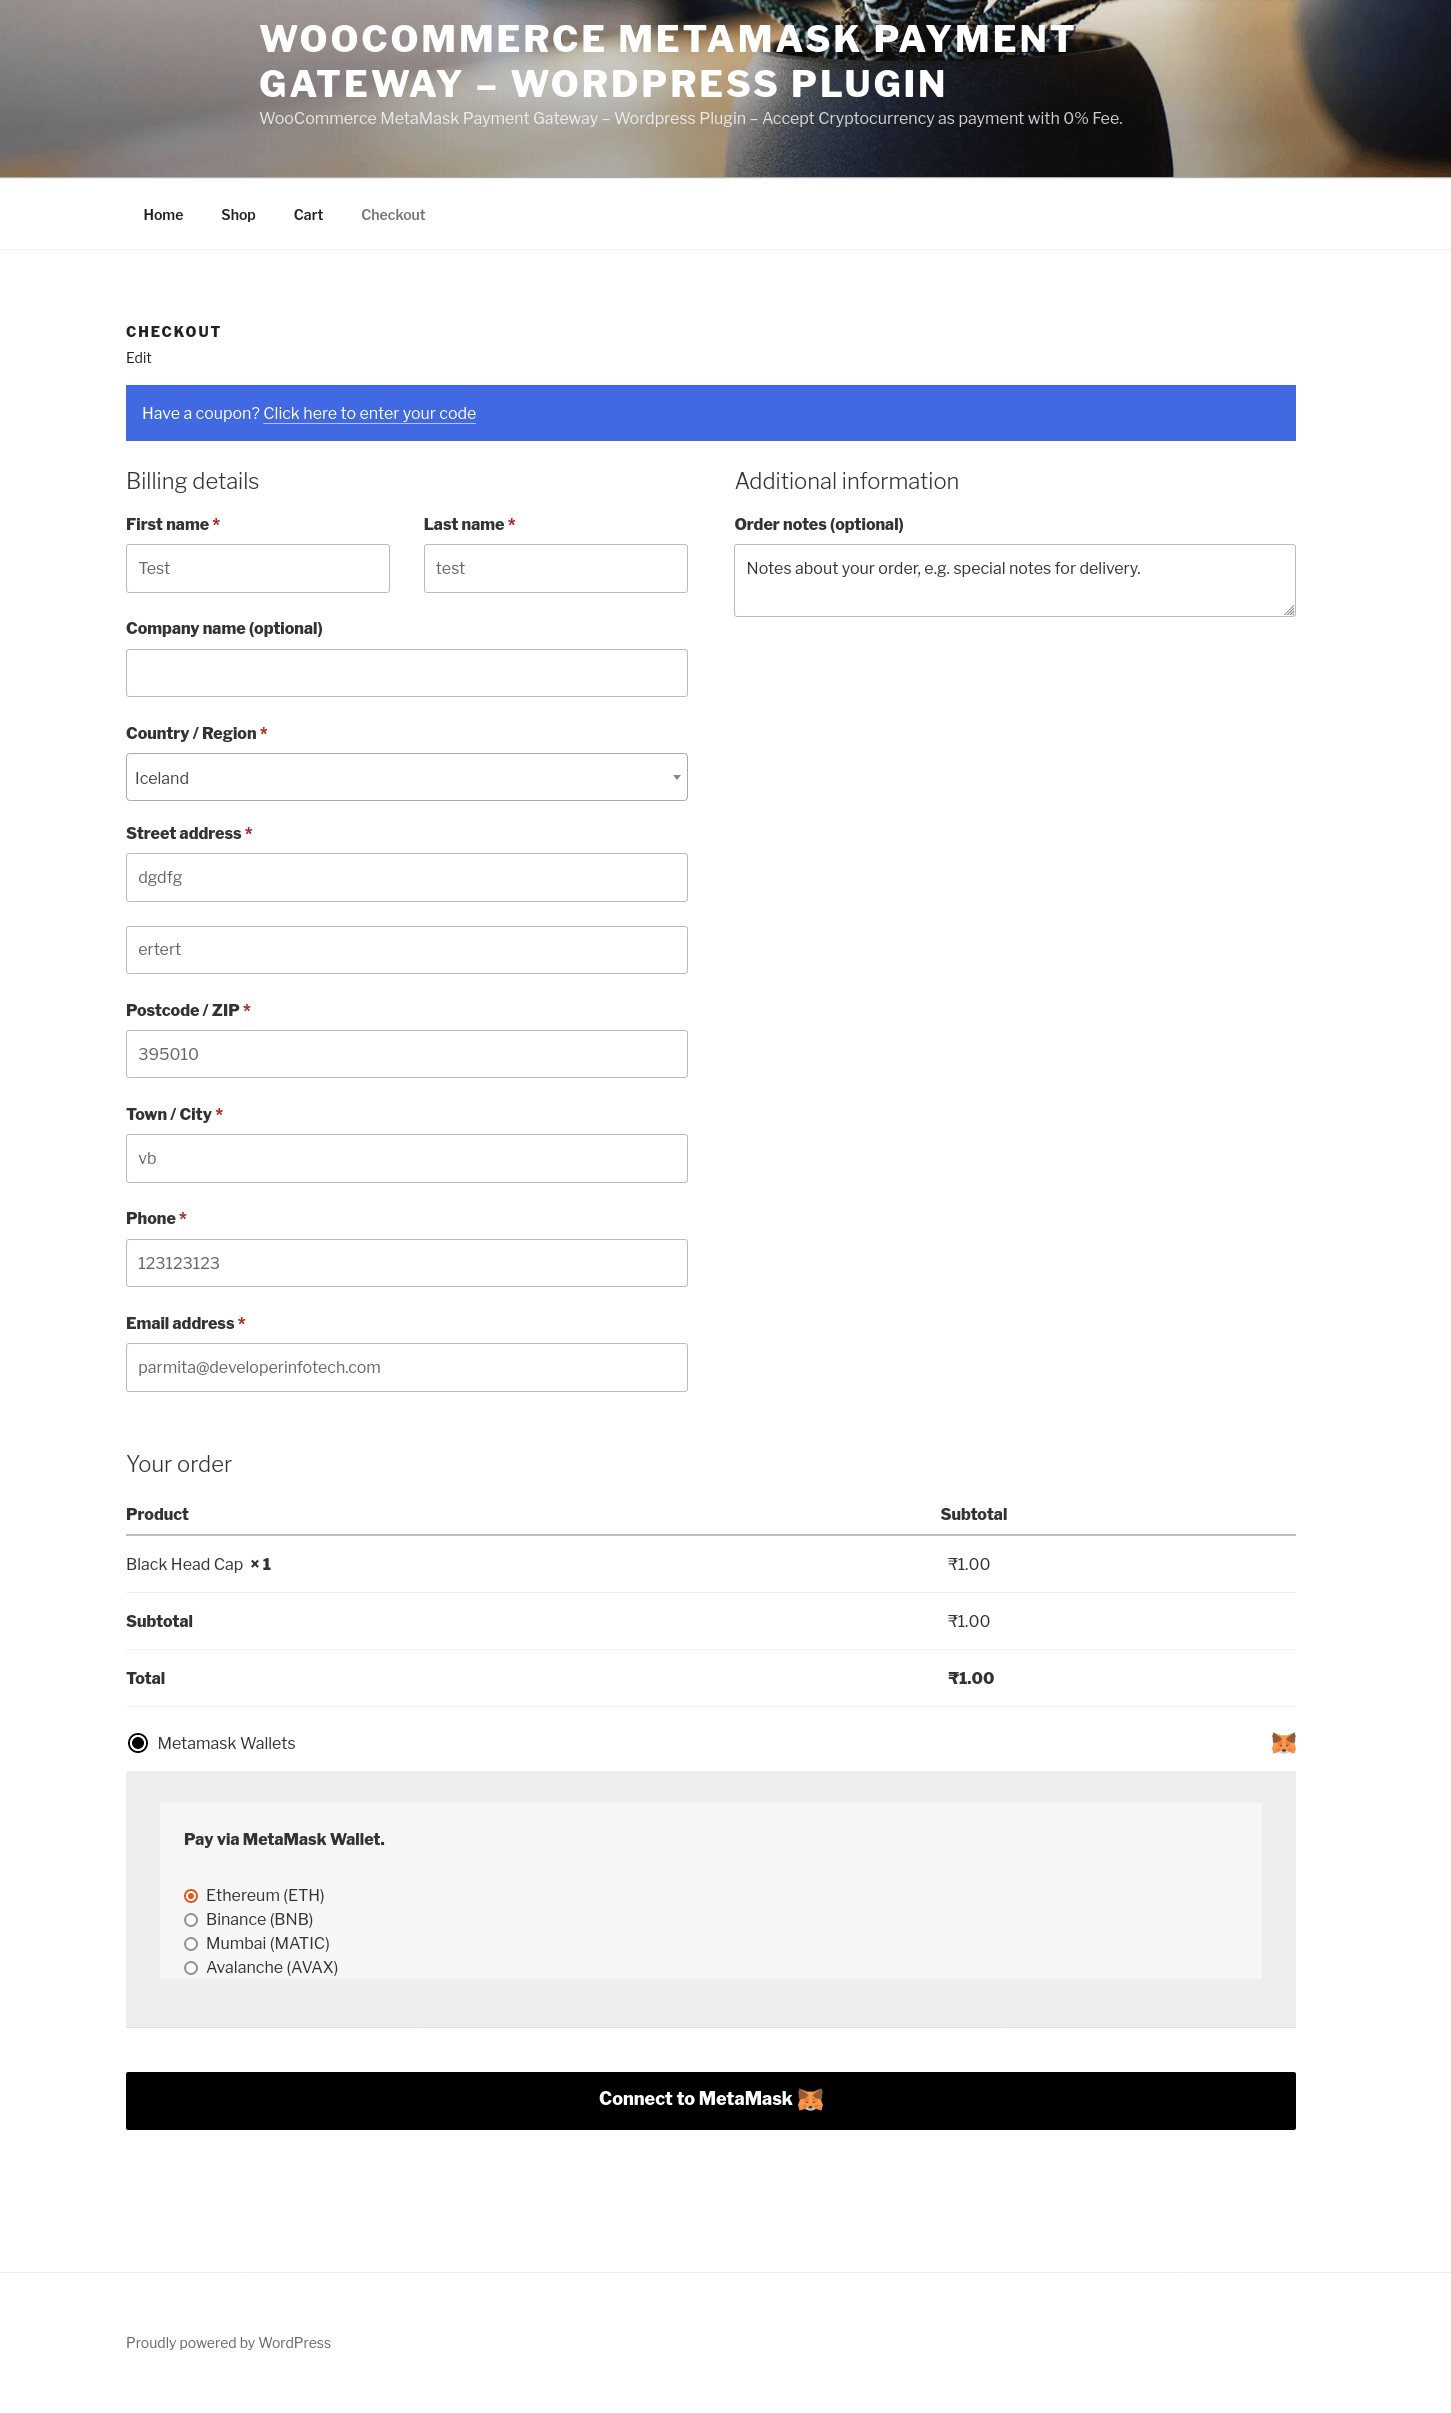
Checkout Page :
Thank You Page :
Free Faucet
Get your Free crypto token balance to the following faucet. Just provide your MetaMask wallet address then will send a free token balance to your wallet address.
- Ethereum (ETH) – https://faucet.ropsten.be/
- Polygon ( MATIC )– https://faucet.polygon.technology/
- Binance ( BNB )– https://testnet.binance.org/faucet-smart
- Avalanche (AVAX)– https://faucet.avax-test.network/
Refunds
We do not provide refunds for these sorts of mistaken purchases. Due to the nature of digital goods, it’s not possible to “return” them. Therefore, refunds can only be given for products that are broken, but this is not the case, as our plugin has been reviewed and accepted by an Envato review team.
Let's do great work together.
Request A Free Quotation!