
Getting Started
Welcome To BattleMania
We would like to thank you for purchasing BattleMania WordPress Plugin – Esports Tournament Manager for PUBG / Free Fire / COD!
We are very pleased that you have chosen BattleMania for your tournament website, you will be never disappointed!
Before you get started, please be sure to always check out this documentation. We outline all kinds of good information, and provide you with all the details you need to use BattleMania WordPress Plugin.
If you are unable to find your answer here in our documentation, we encourage you to contact us through our chat system with your site CPanel or FTP details. We’re very happy to help you and you will get reply from us more faster than you expected.
Thank you, we hope you to enjoy using BattleMania WordPress Plugin !
Introduction
🚀 Run your own eSport tournaments on WordPress – No app required
BattleMania WP is a complete eSports tournament solution for WordPress. Create and manage matches or tournaments for games like PUBG, Free Fire, COD, and more – directly from your WordPress dashboard. No need for Android/iOS apps. Your users get a fully functional front-end account panel to join matches, track results, manage wallets, and more.
You get everything inside your site – fully integrated with the WordPress ecosystem. Whether you’re running an eGaming site, a clan website, or a gaming marketplace, this plugin gives you all the tools you need.
Requirements
- PHP 8.0 or greater. (You can see this under WooCommerce > Status).
- An SSL Certificate is to be installed on your site to ensure your customers’ details are safe.
- WooCommerce Plugin 10.0.0 or greater
- WordPress 6.8.0 or greater
Recommended PHP Configuration Limits
Many issues are all related to low PHP configuration limits. The solution is to increase the PHP limits. You can do this on your own or contact your web host and ask them to increase those limits to a minimum as follows:
- max_execution_time 500
- memory_limit 512M
- post_max_size 512M
- upload_max_filesize 12M
- CURL enable
Installation
Manual Installation
How to Upload a WordPress Plugin from a File
The WordPress dashboard contains a dedicated Plugins section where you can add, remove and manage the plugins.
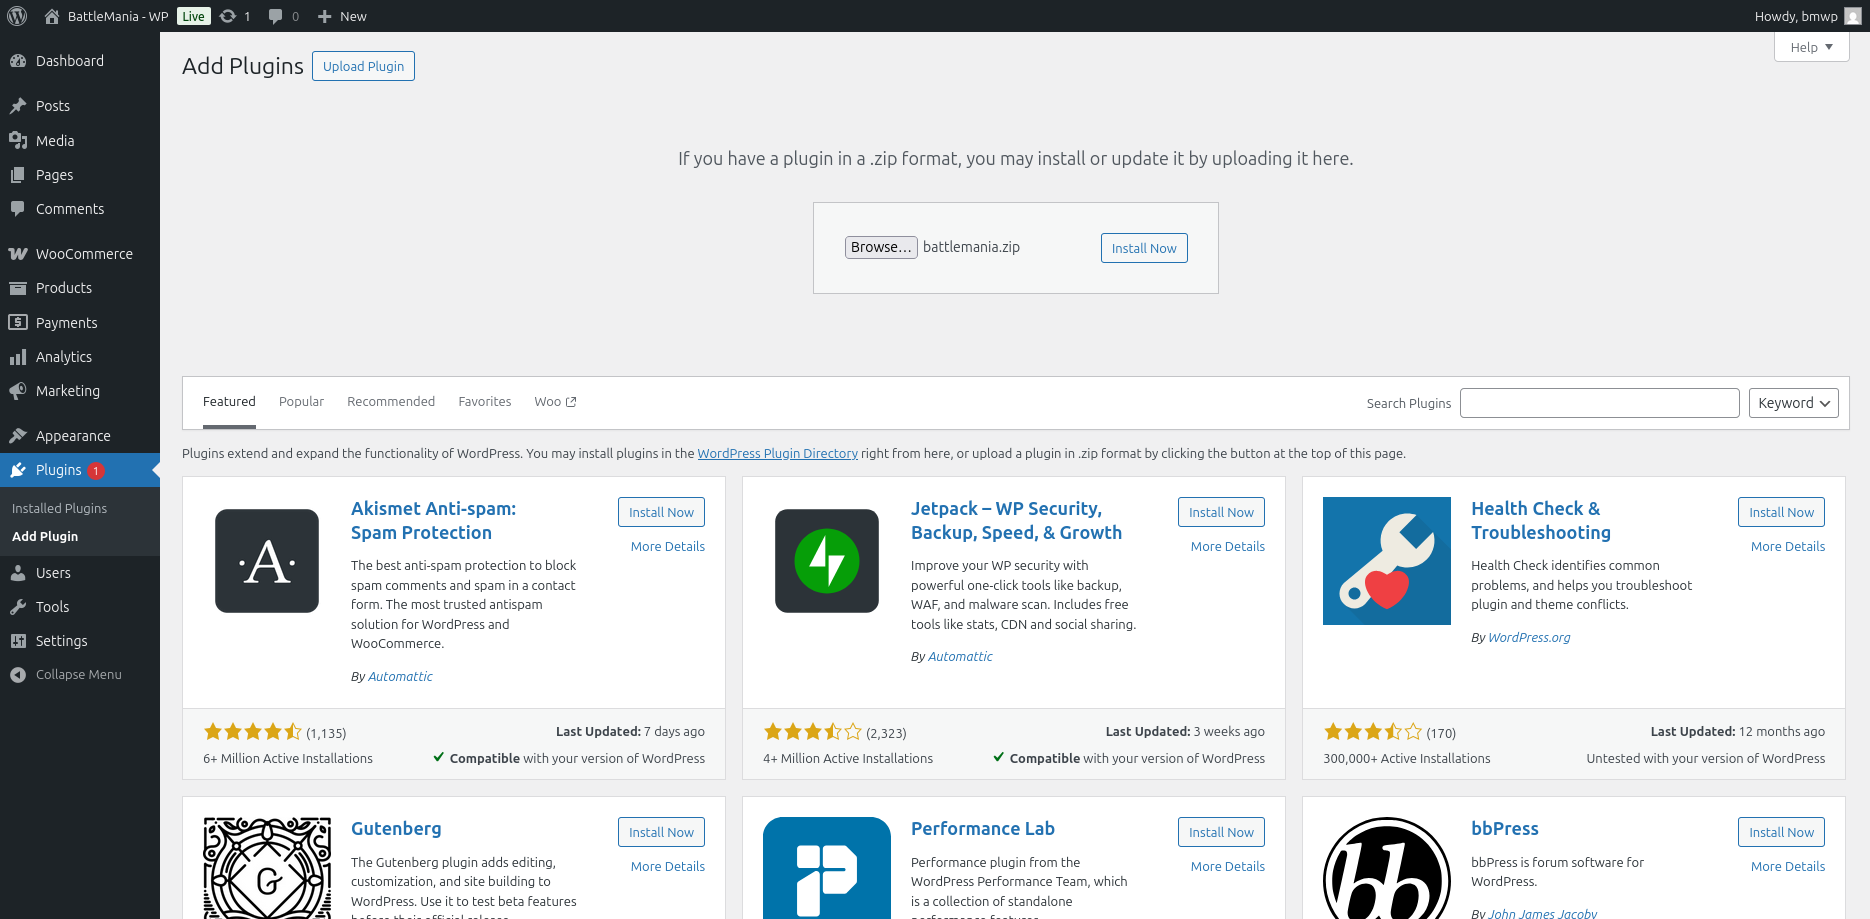
2. Then click on “Activate.”
Installation via Ftp Client
How to install WordPress Plugins Manually
Some users prefer manually installing plugins by directly uploading a plugin in the WordPress wp-content/plugins directory. This method is required when the plugin ZIP file is too large and exceeds the server’s PHP max_upload_size limit.
To manually upload a plugin, you need access to your WordPress installation folders. You can use a File Manager in your hosting panel or FTP client. Below, you will find the steps for both options.
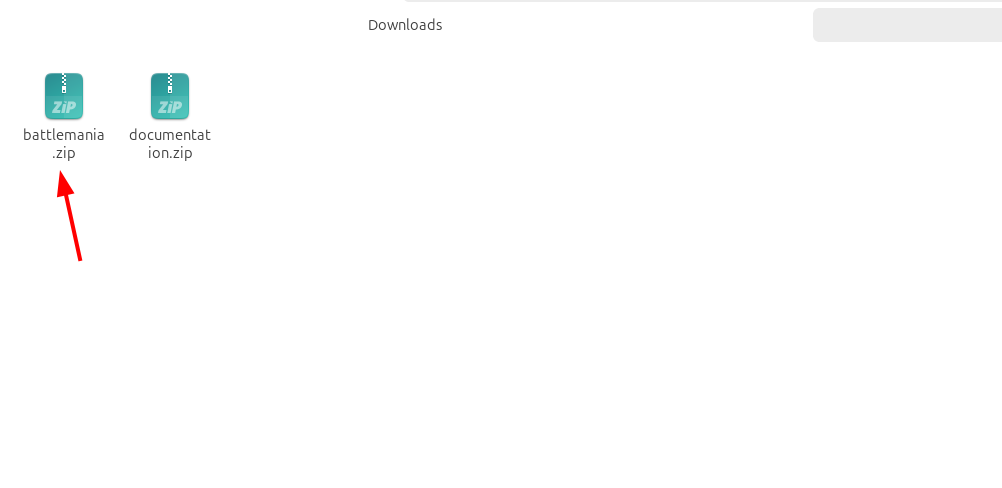
1. Unzip the package and find plugin zip file.
2. The file will be unzipped in a new folder containing the plugin’s assets.
3. After you’ve connected to your server via FTP, the website’s files and folders will appear on the right side of the FTP client. Open your website folder and navigate to the subfolder public_html/wp-content/plugins.
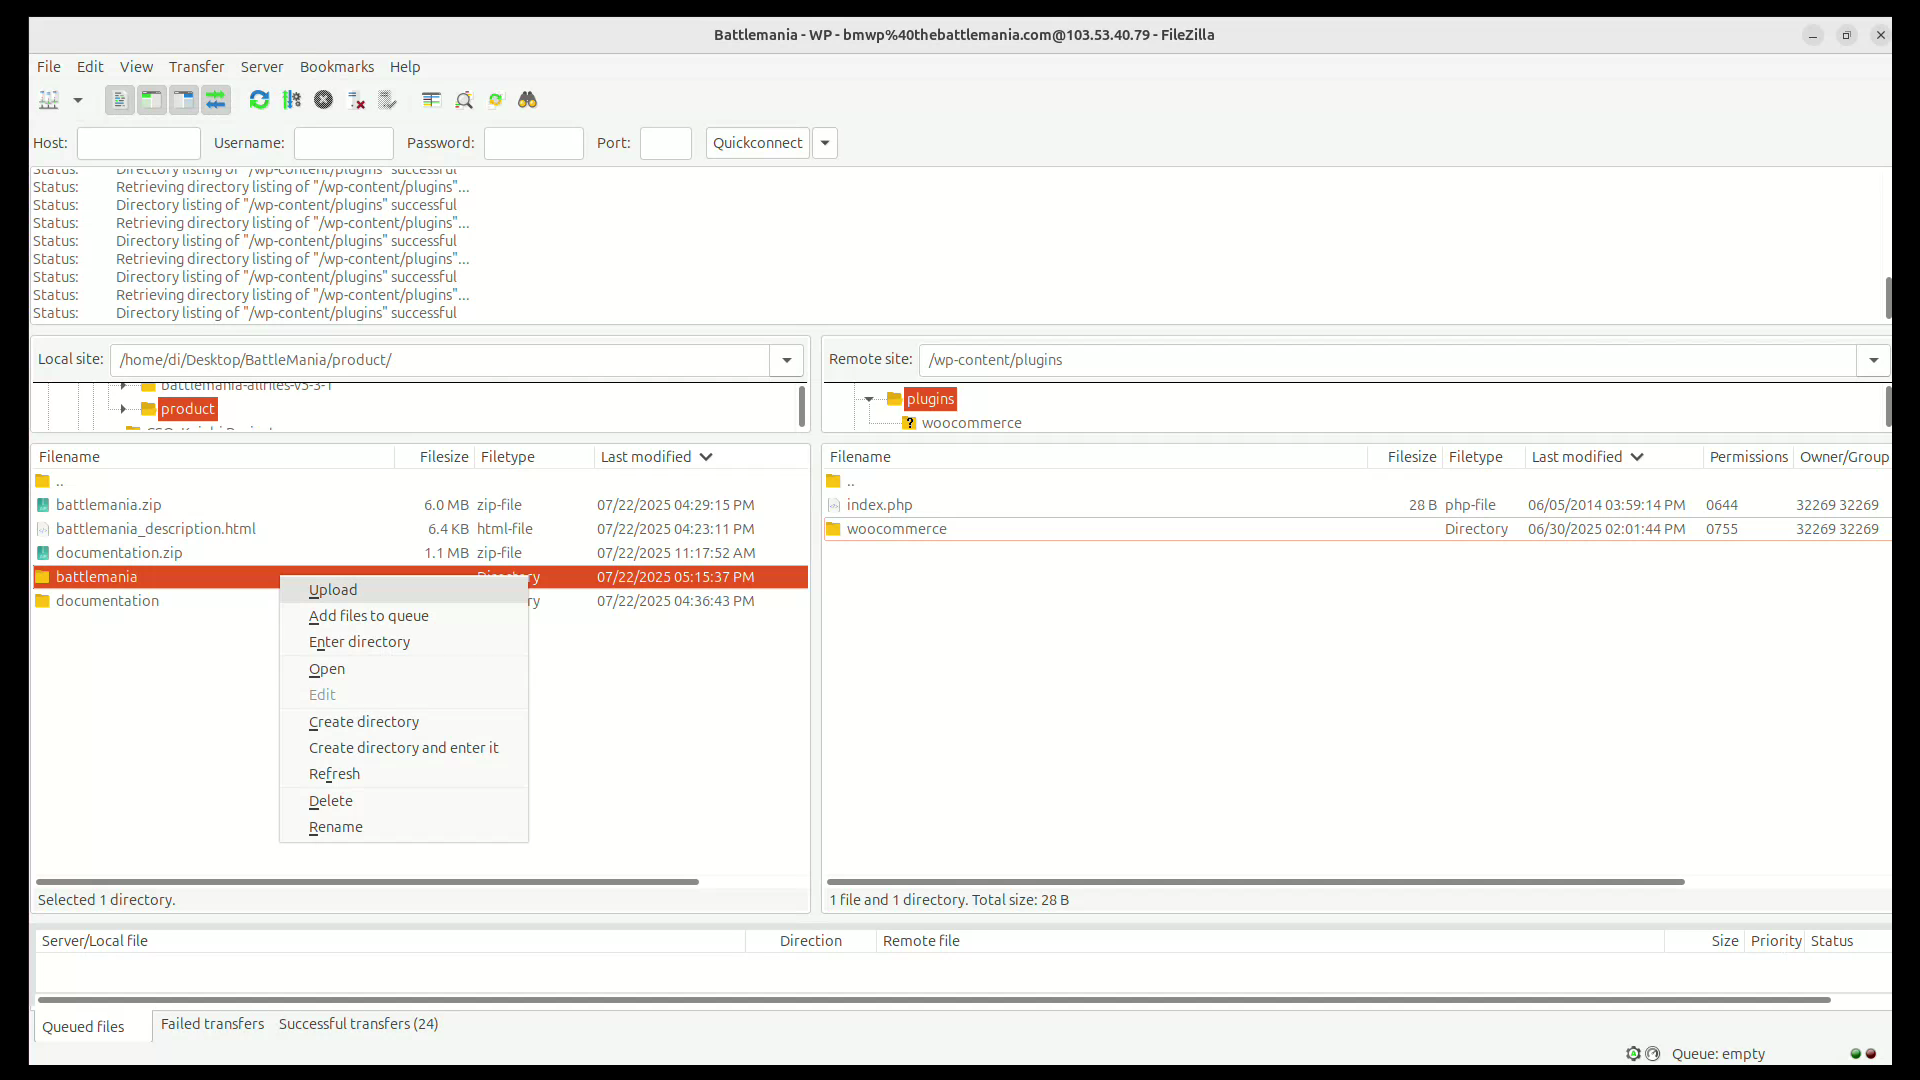
4. You can browse your computer files on the left side of the FTP client. Find the folder you previously extracted, right-click on it, and select Upload.
5. The folder and all its content will start uploading. Once the transfer is complete, the FTP client will display a “success” log, and the uploaded folder will appear in the “plugins” folder on the right.
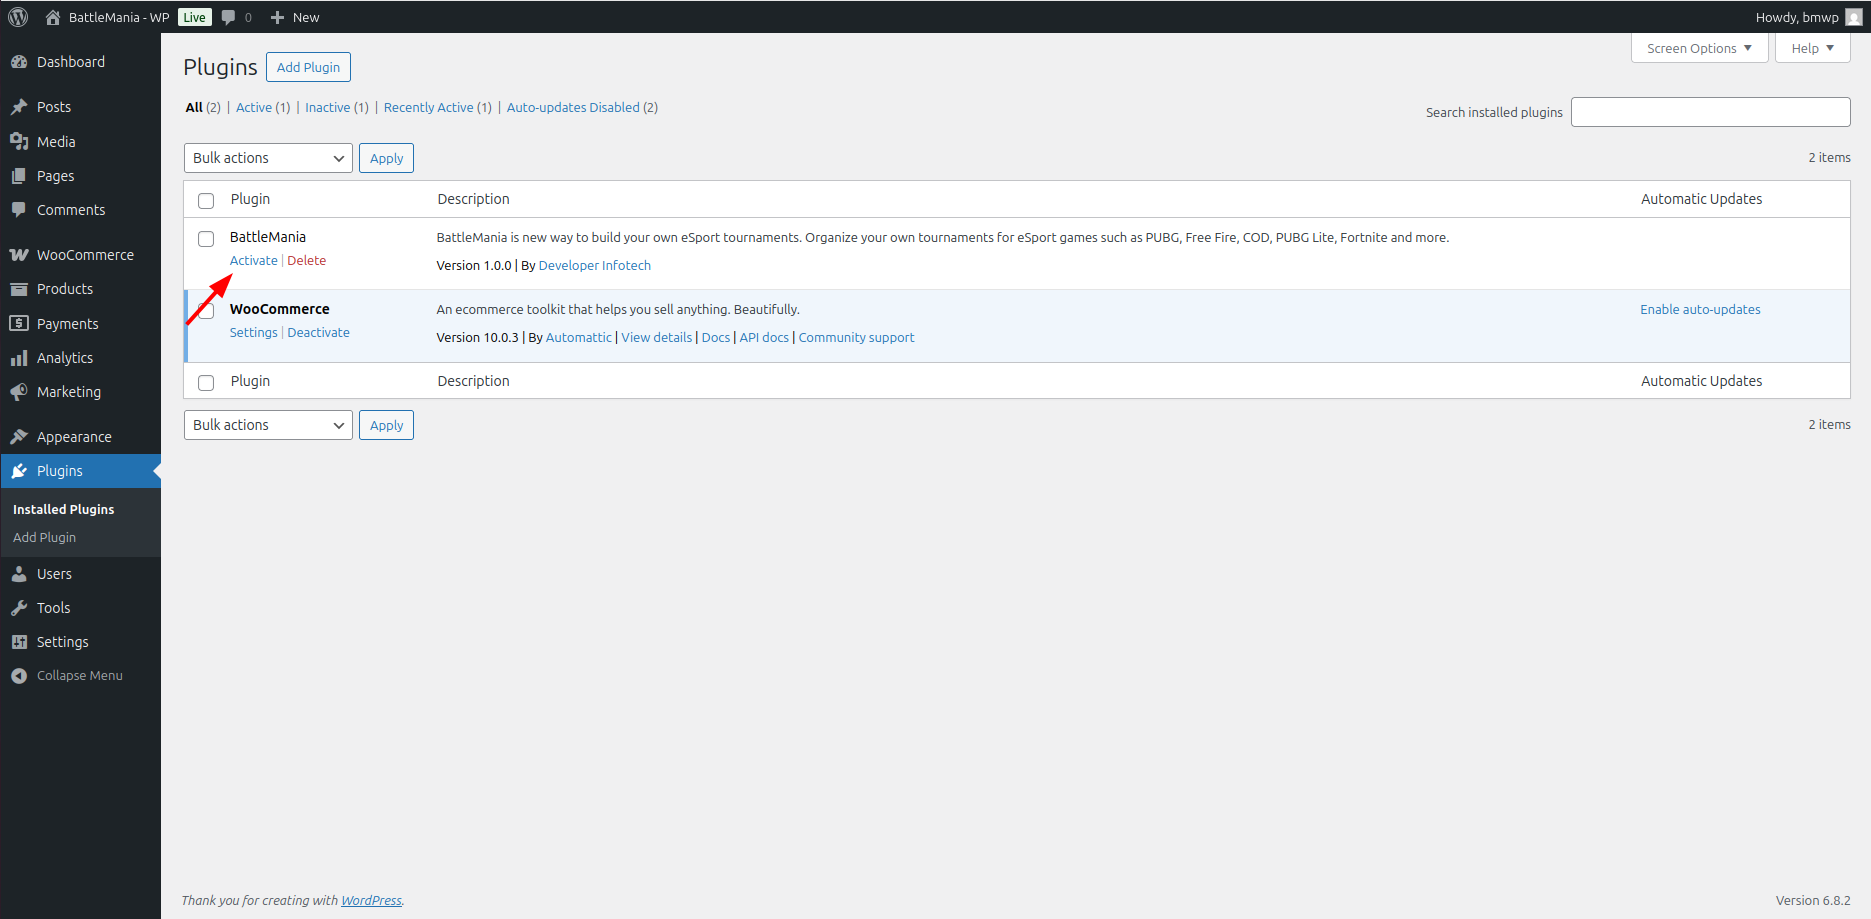
6. Now, if you log into your WordPress dashboard, the uploaded plugin will be listed in the Plugins section. Press Activate to enable the plugin on your website.
Website & Admin Settings
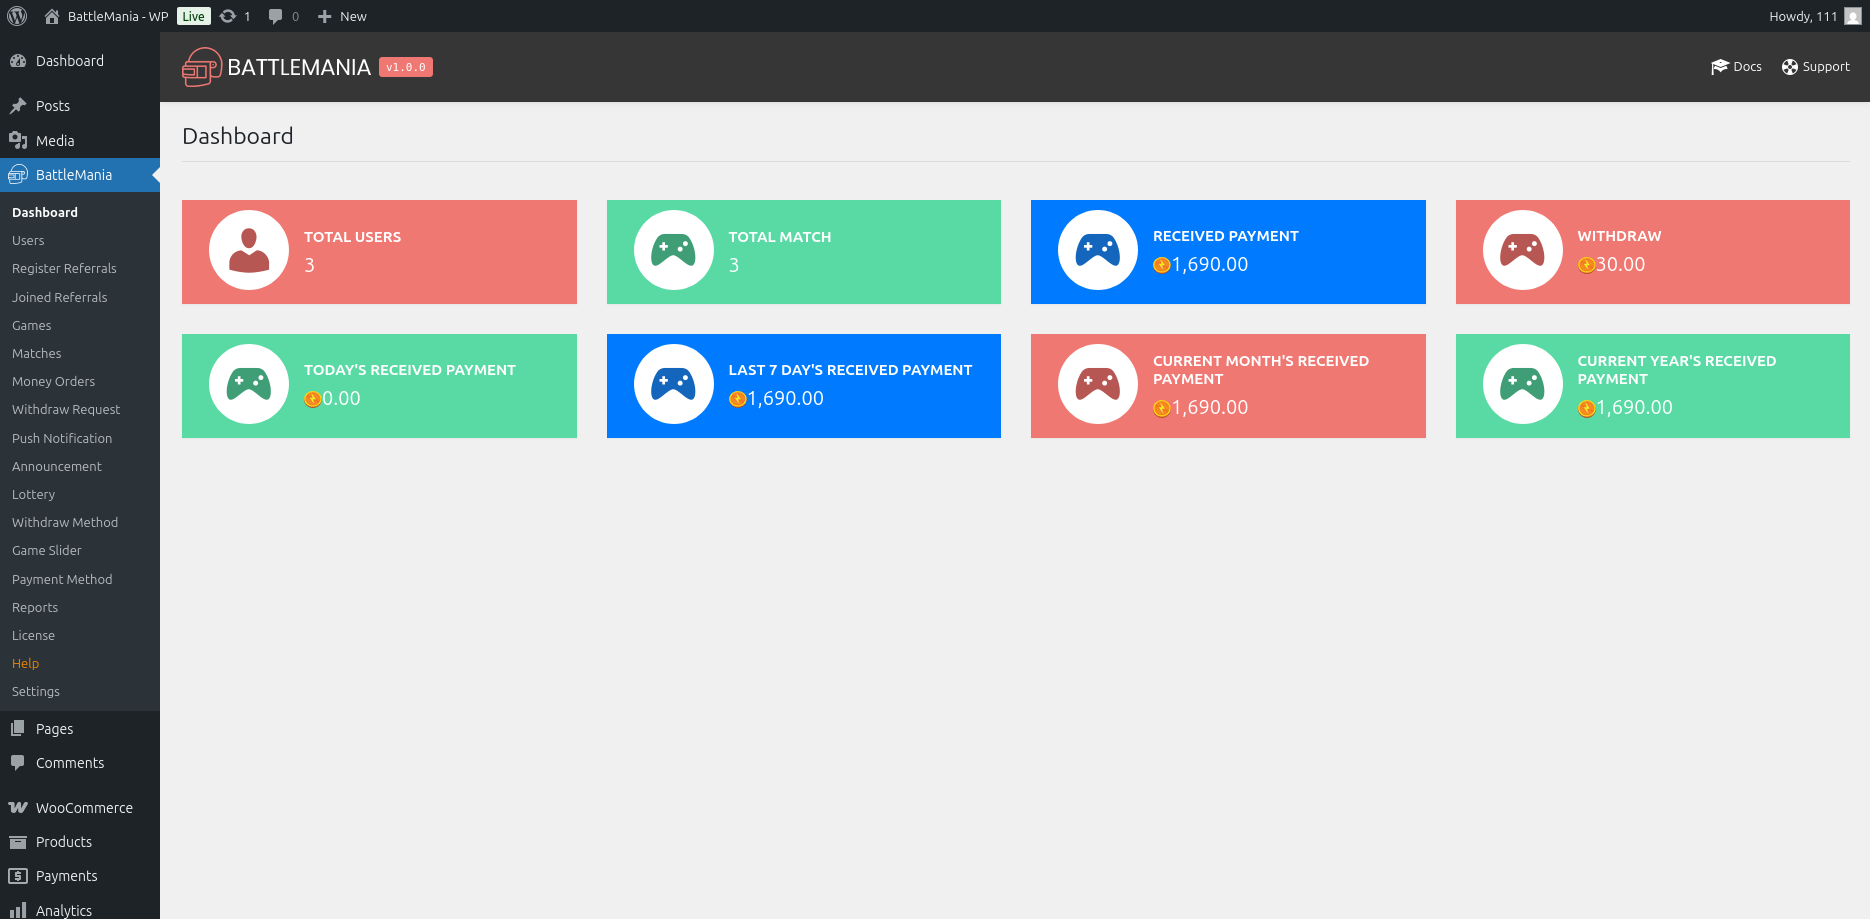
Dashboard
The main overview panel showing total users, total matches, received payments (daily, weekly, monthly, yearly), and withdrawals. Useful for quickly monitoring platform performance and financial metrics.
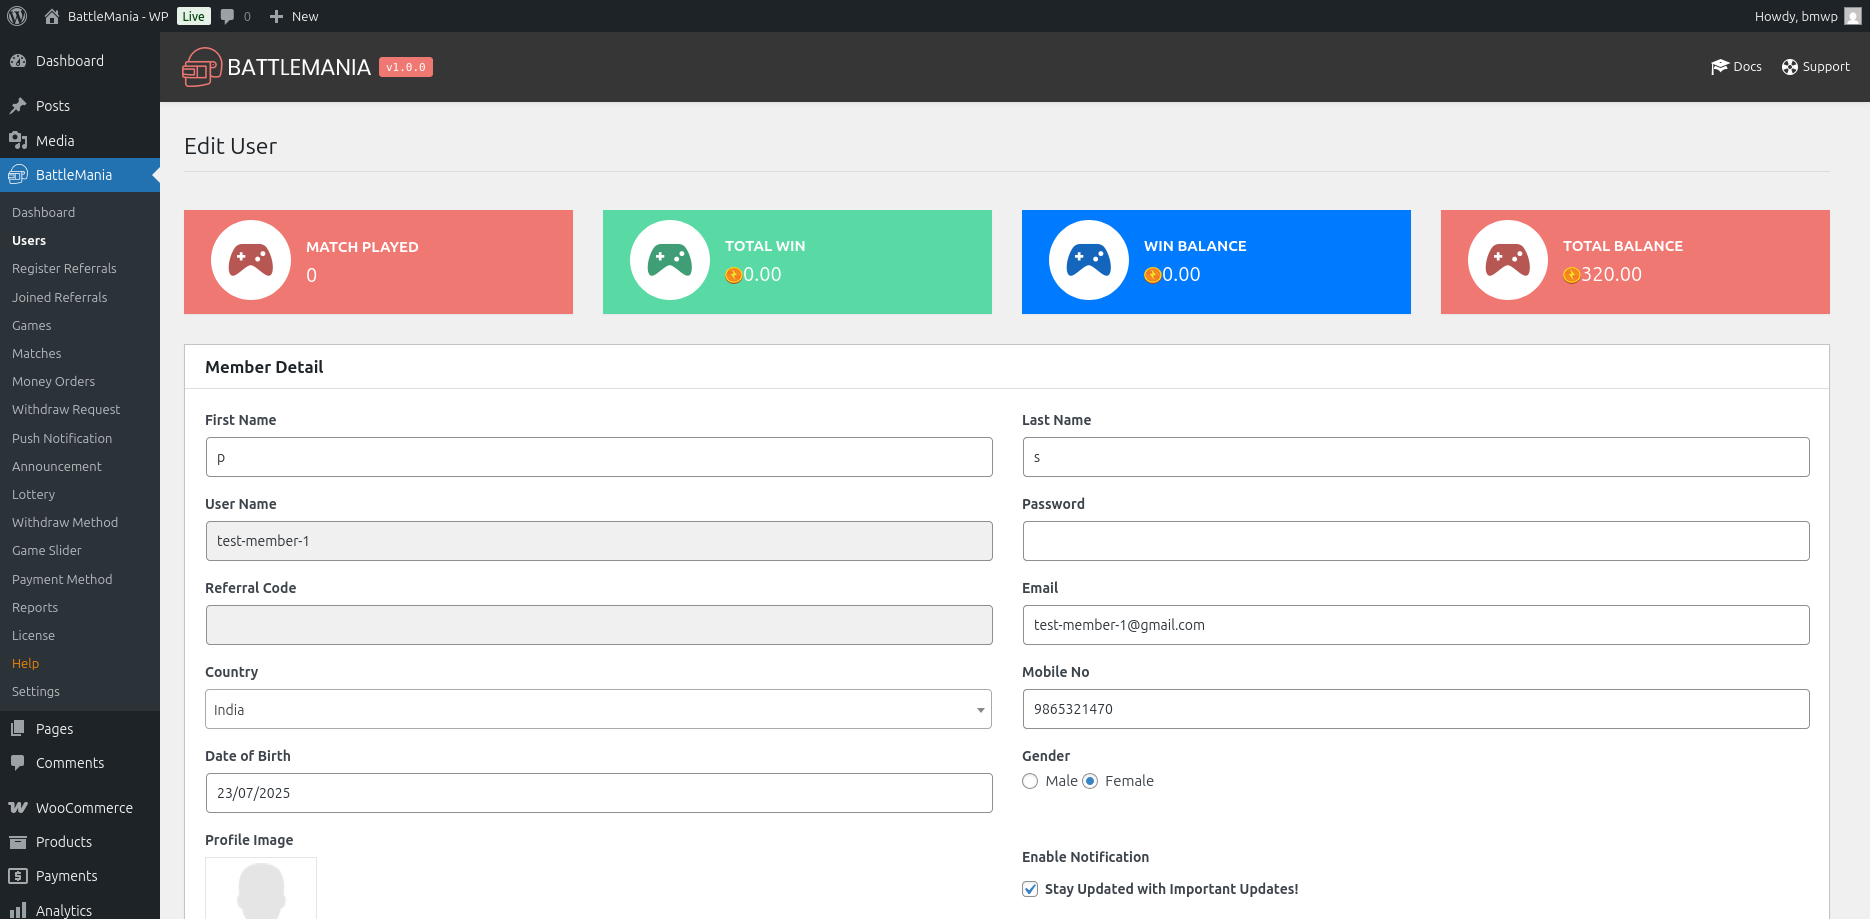
Users
Manage all registered users. View user profiles, update user details, check their wallet balances, user statistics, and referral income. Also you can money to there wallets.
Register Referrals
Track users who registered using referral codes. Useful for monitoring user growth via referral marketing.

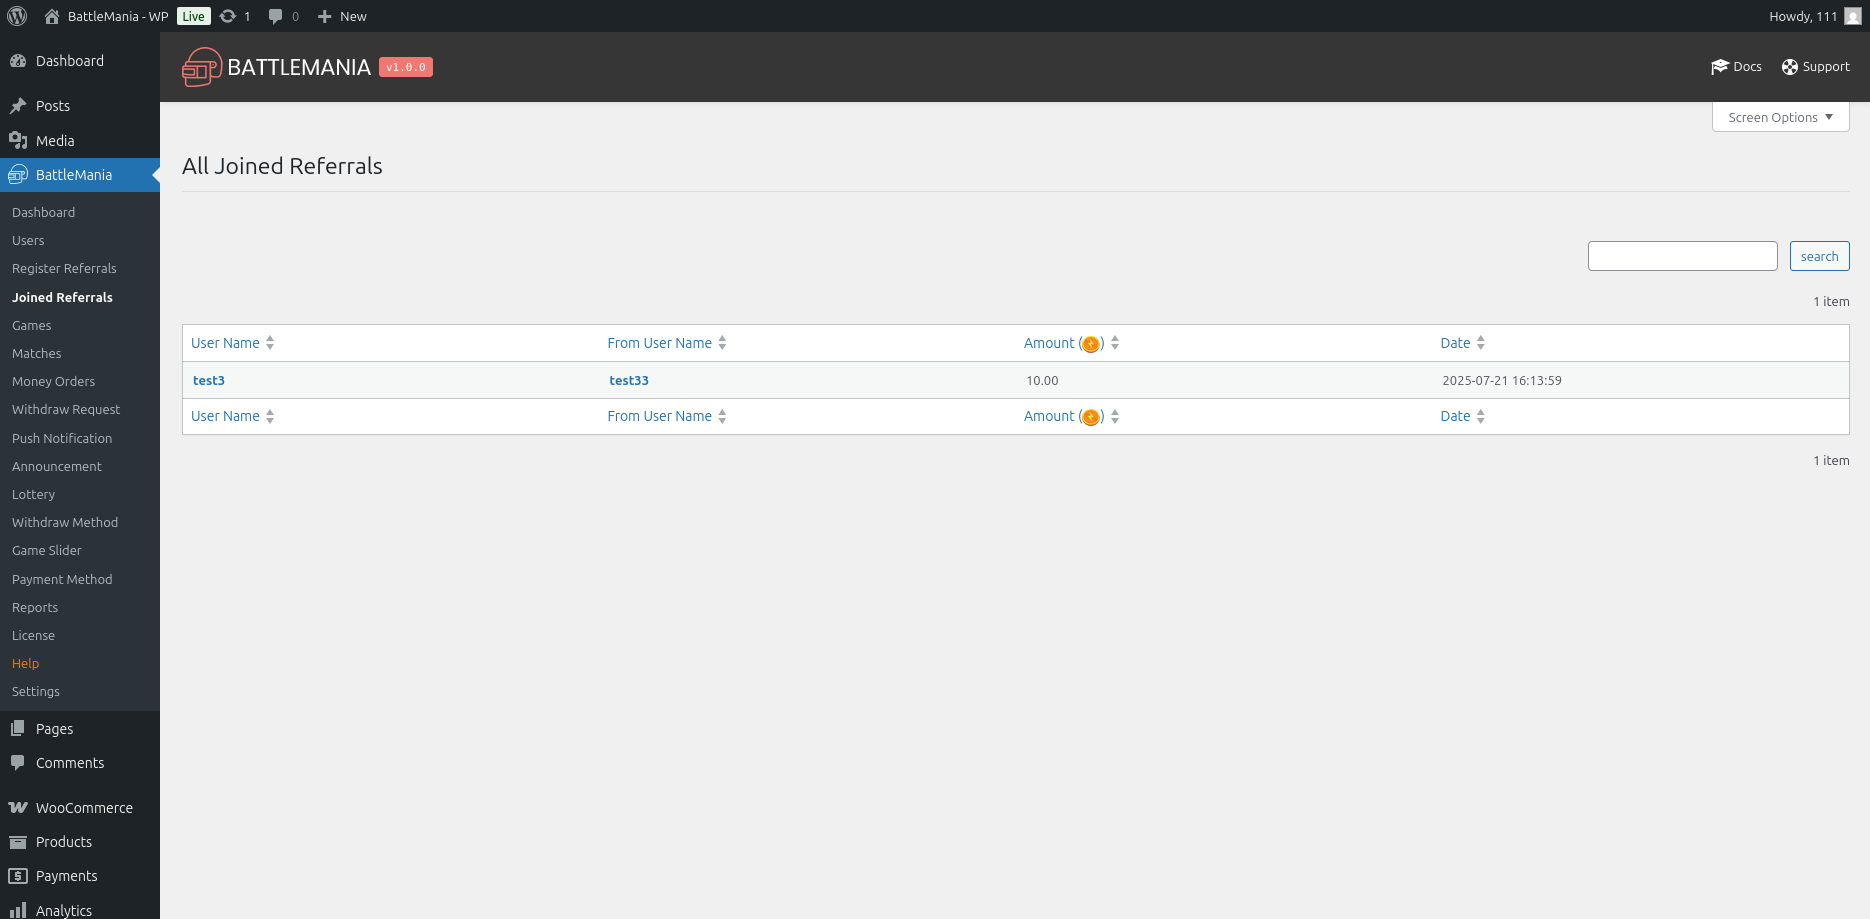
Joined Referrals
Displays users who successfully joined matches after register through a referral link or code. Helps in calculating referral rewards.
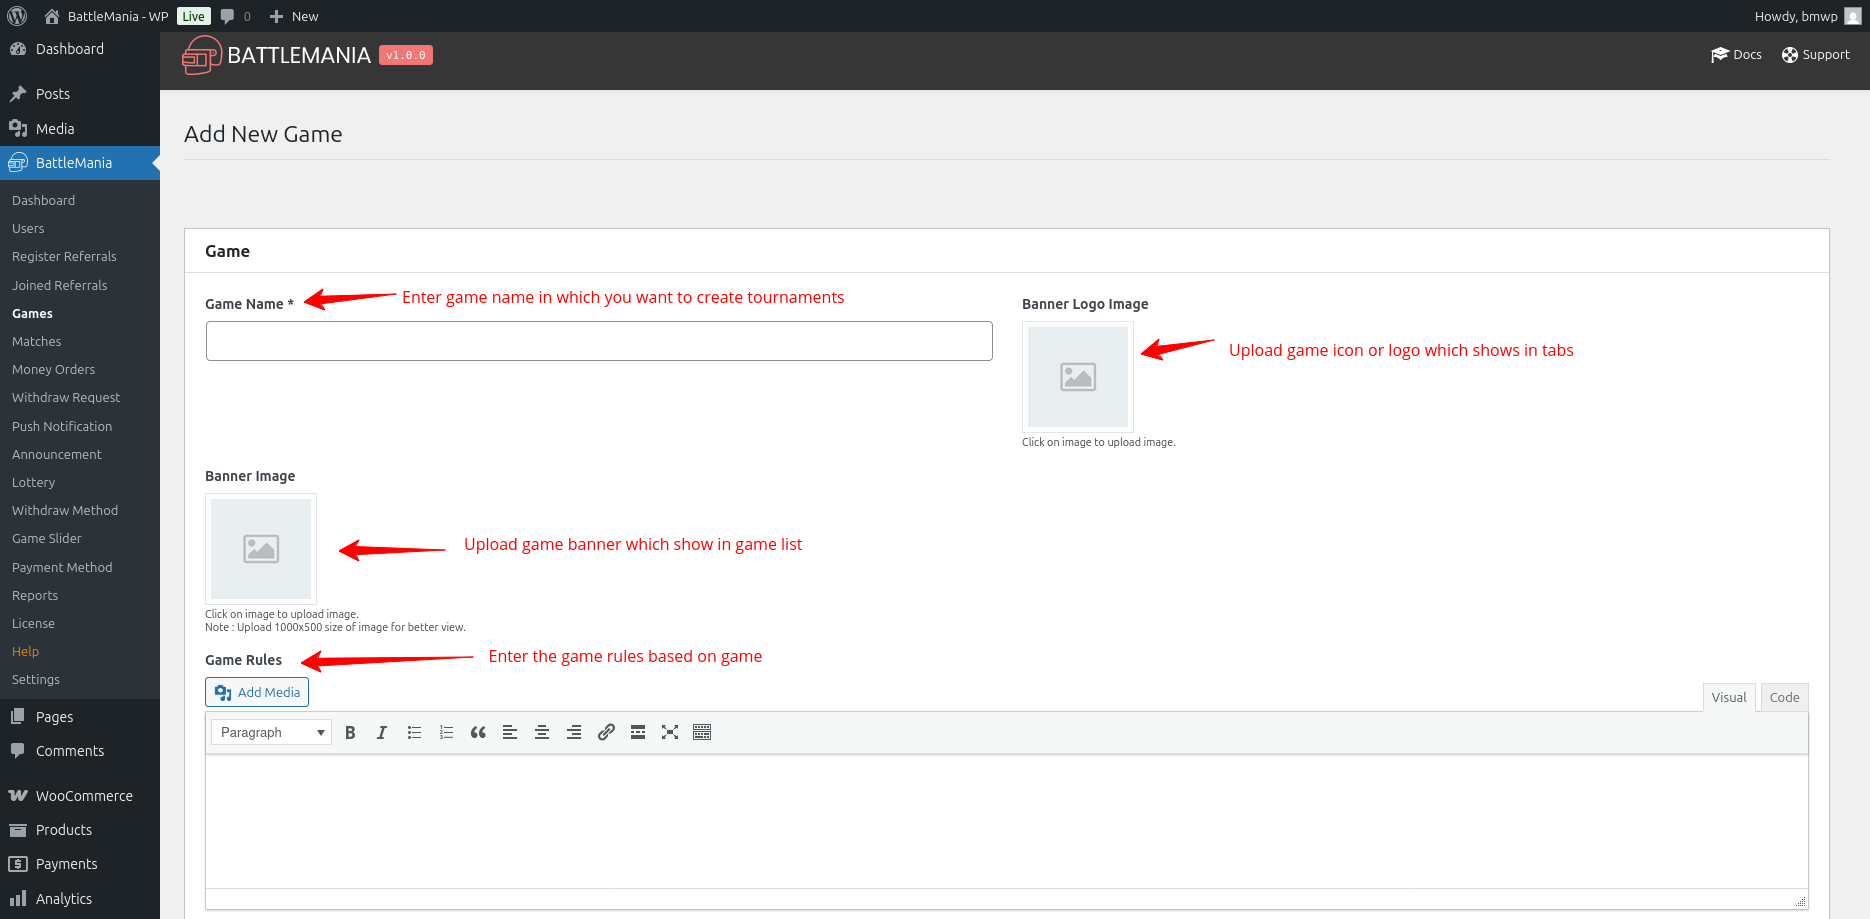
Games
Add, edit, or delete game details supported by your platform (e.g., PUBG, Free Fire, COD). You can also upload game images and organize them for better visibility on the frontend.
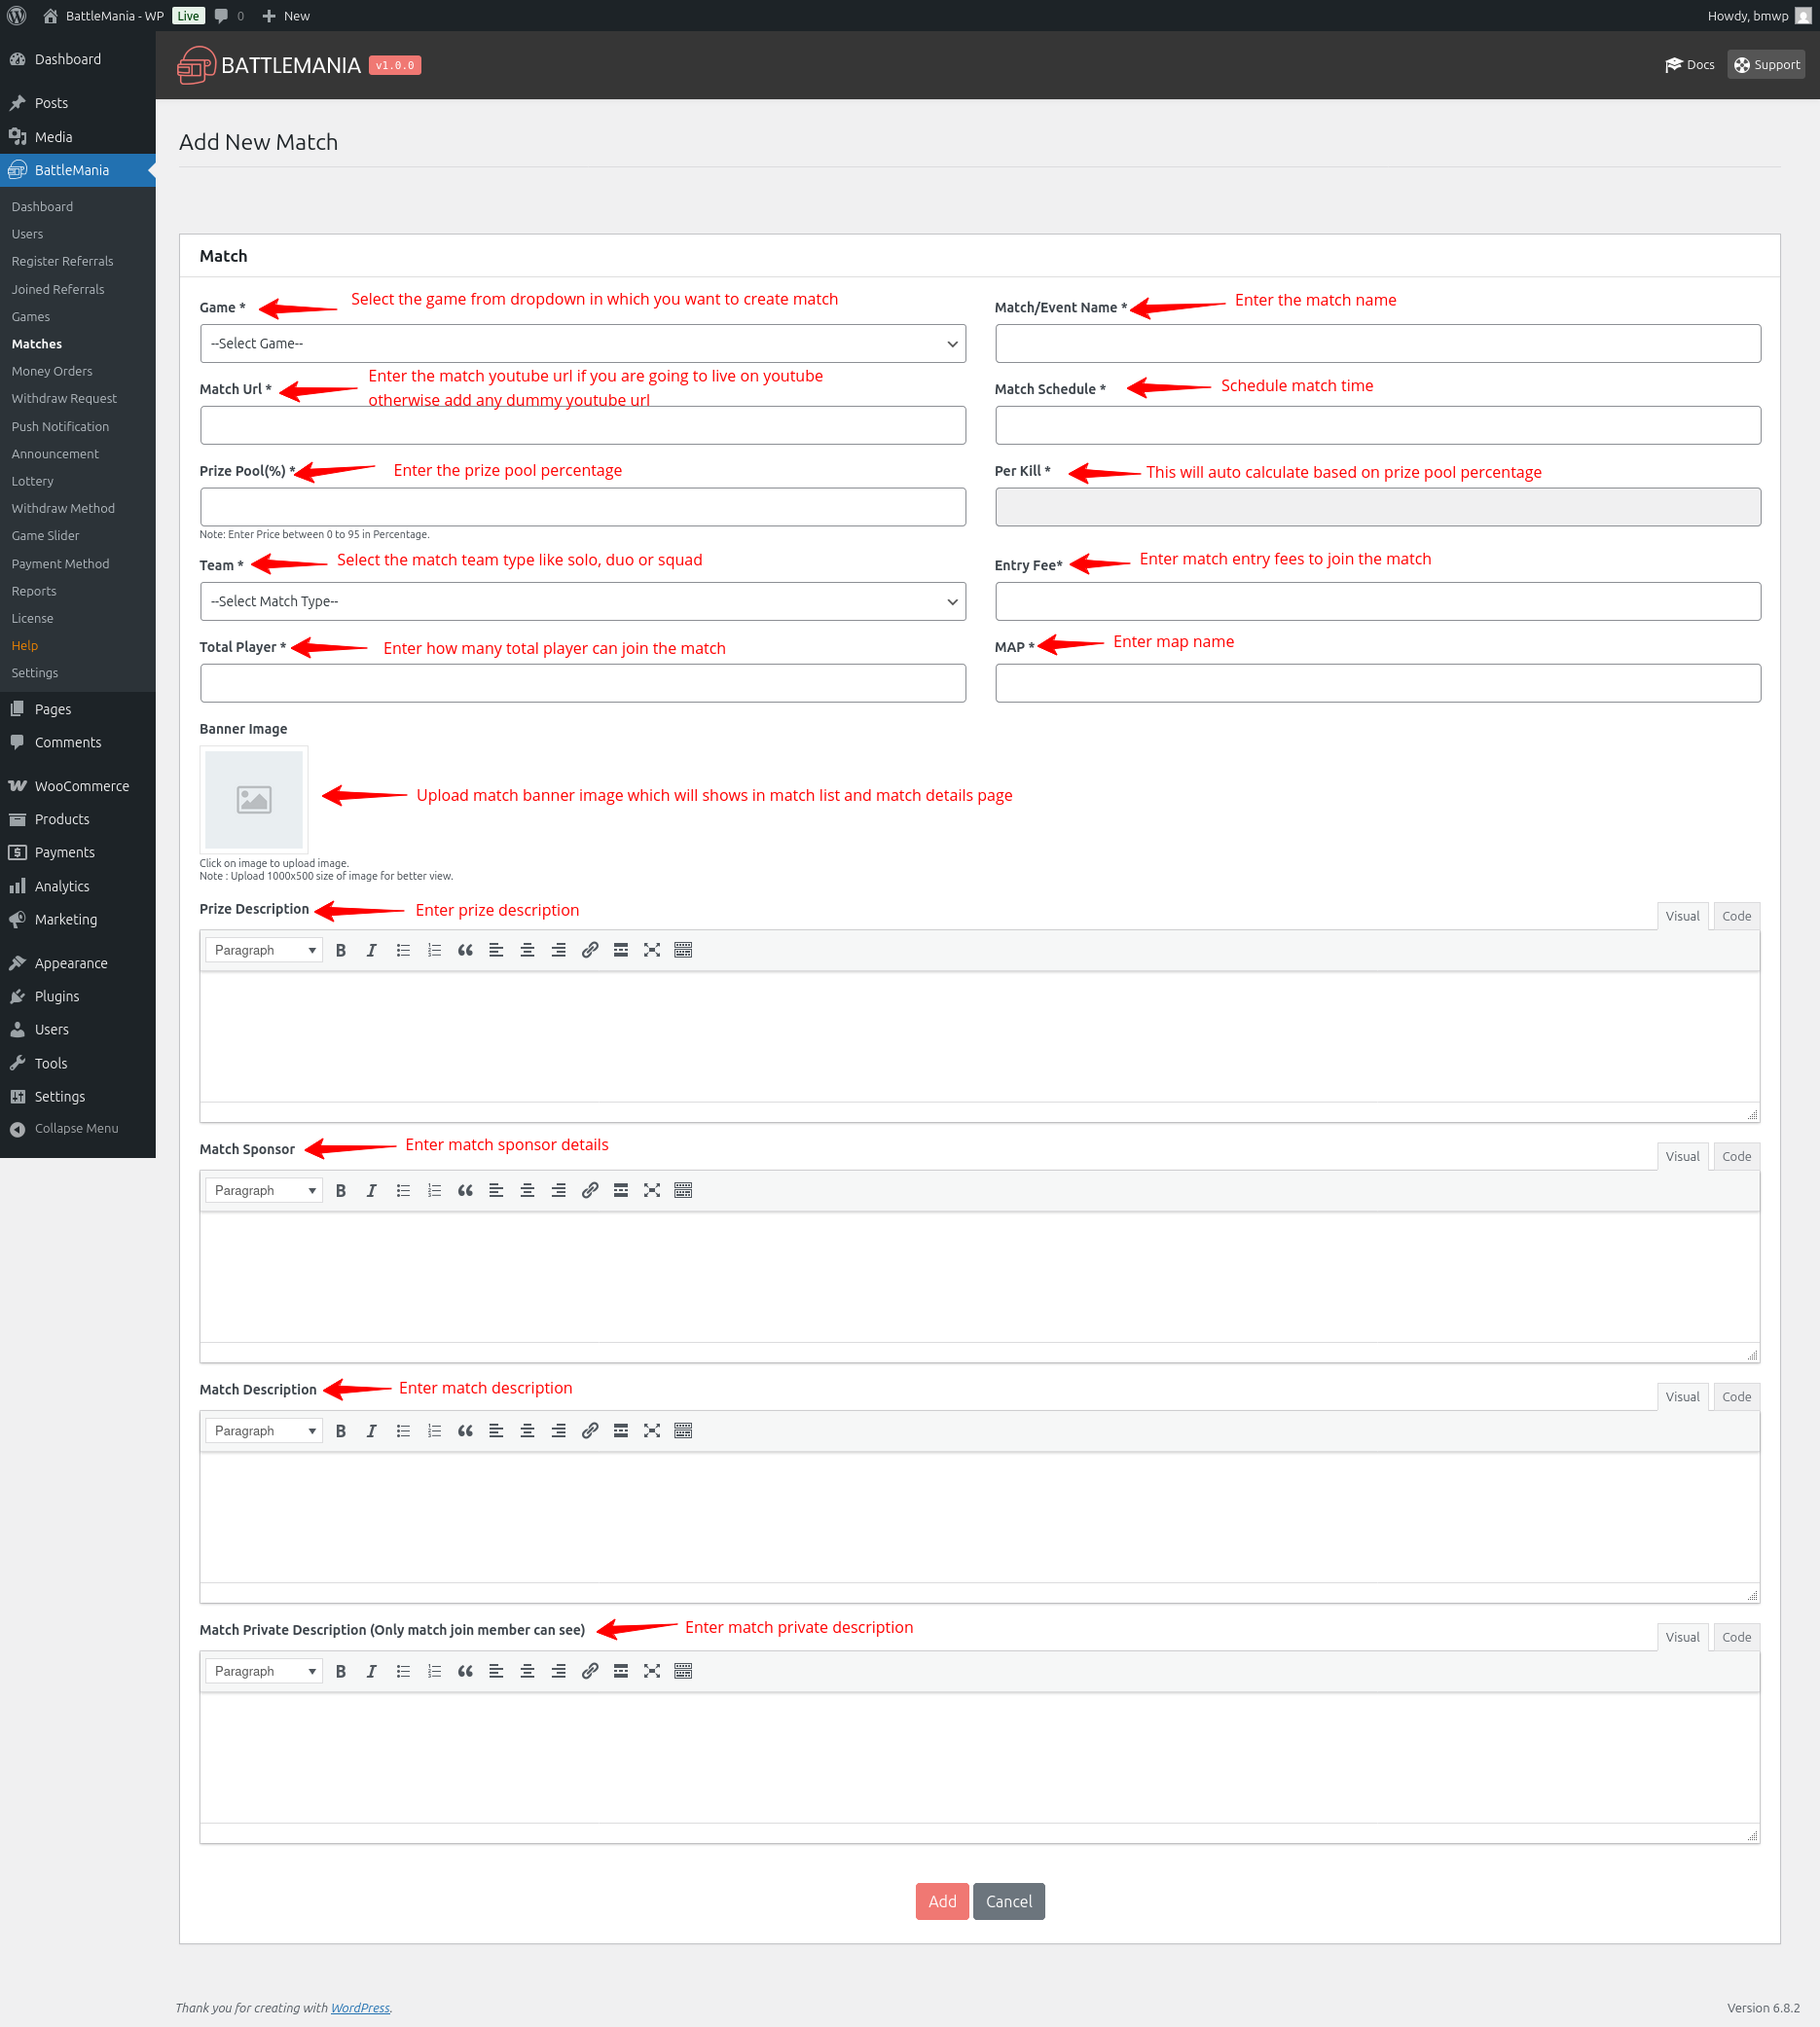
Matches Or Tournaments
Create and manage Solo, Duo, and Squad matches or tournaments. Configure match details including: Game, Tournament/Match name, Schedule Match, Entry Fees, Free/Paid, Team Type and etc.
So how you can create match that you can see in below screenshot.
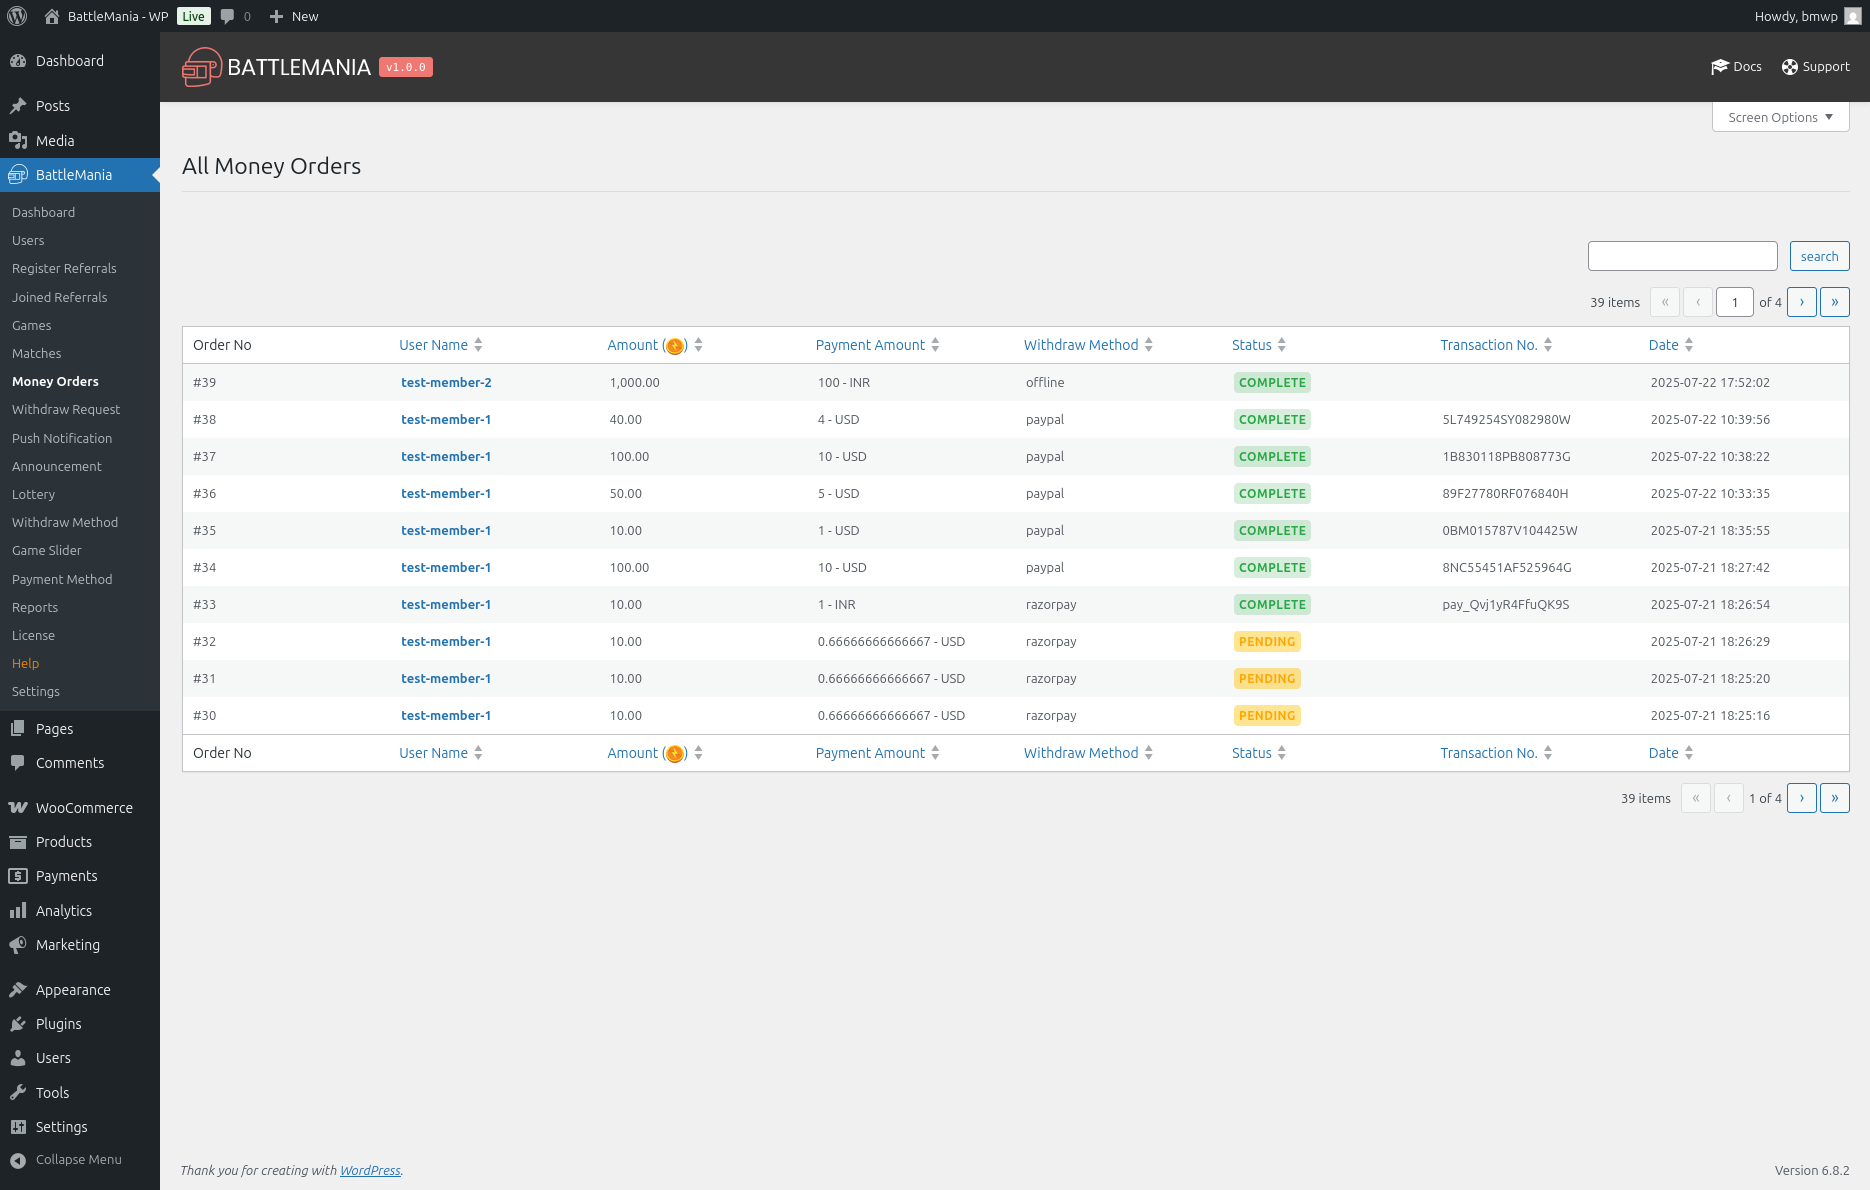
Money Order
View all user payment transactions such as deposits made through payment gateways. Useful for tracking who added funds and when.
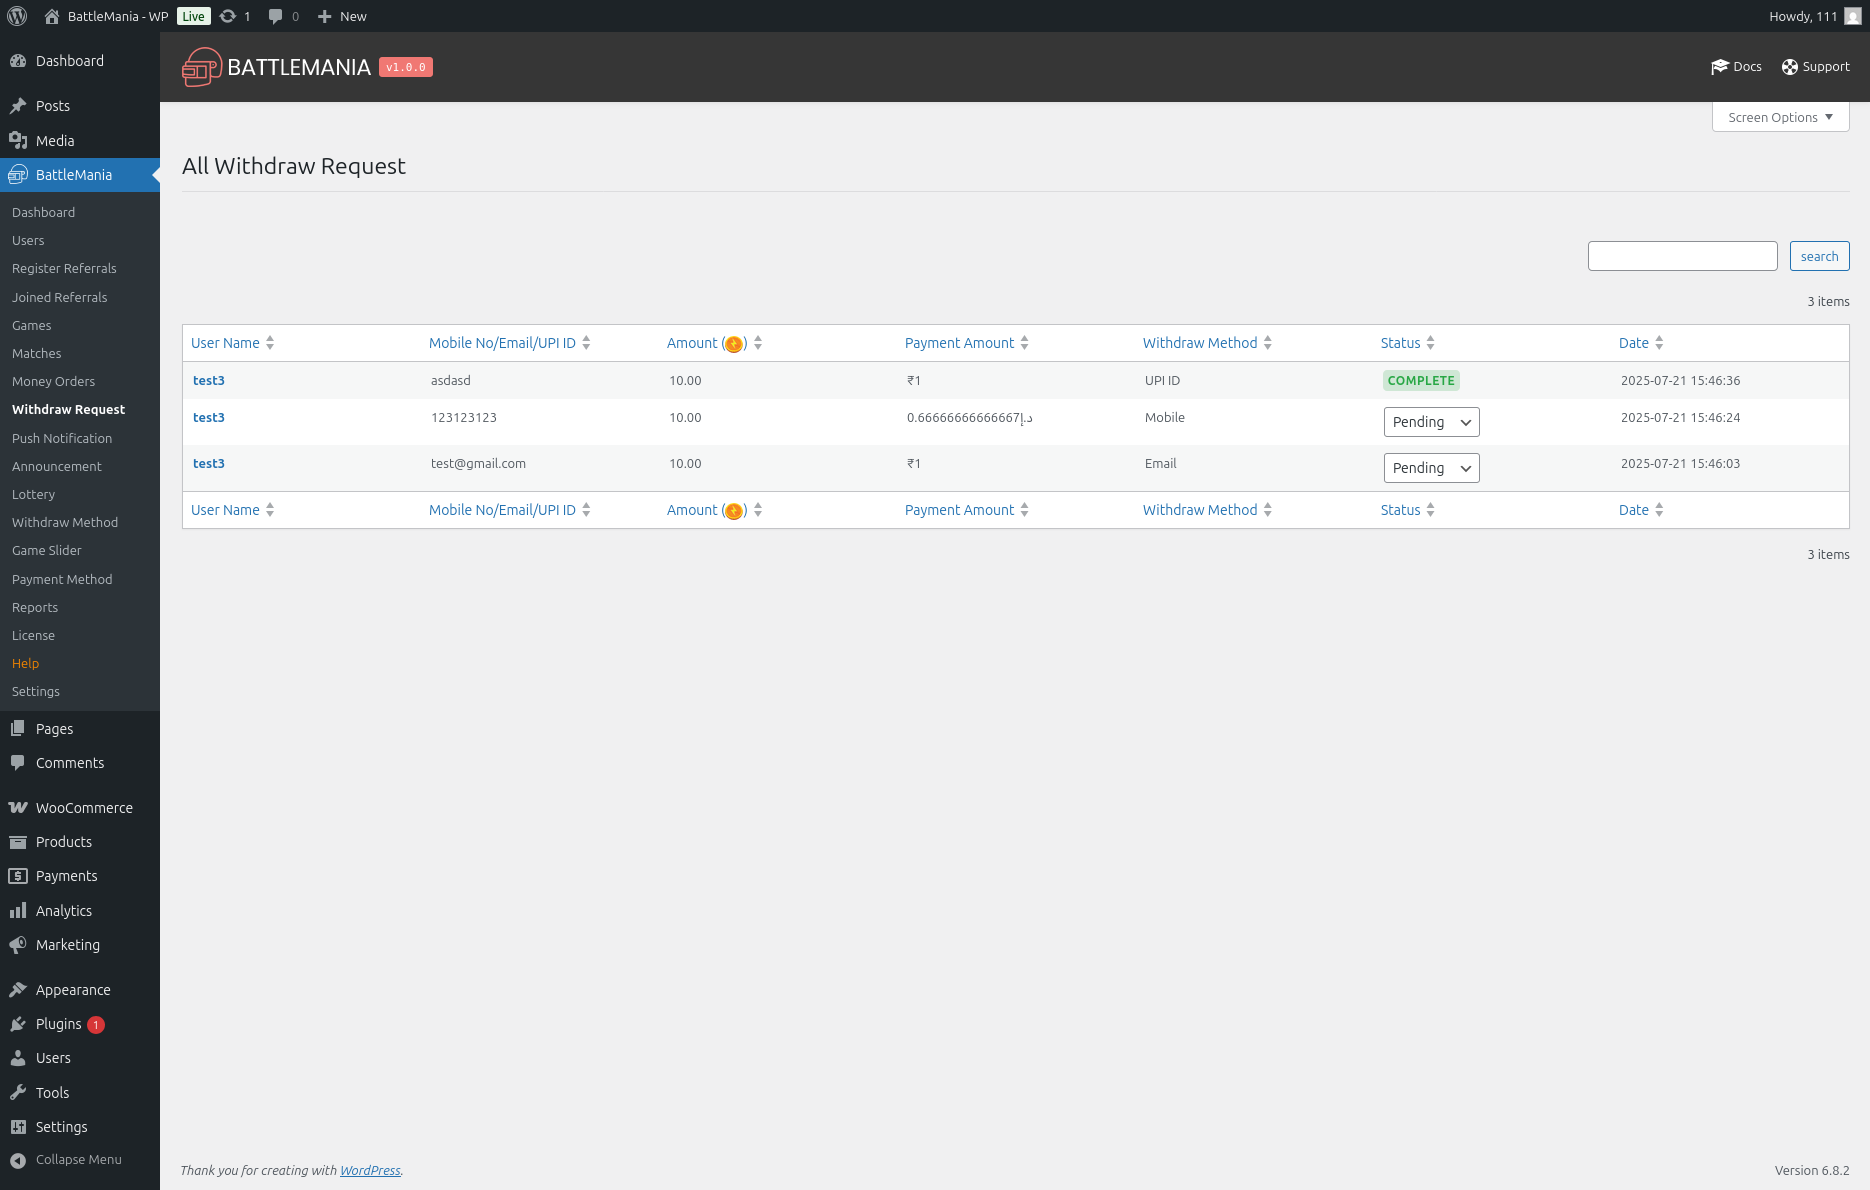
Withdraw Request
Manage withdrawal requests from users. You can approve, reject, or mark requests as completed.
Push Notification
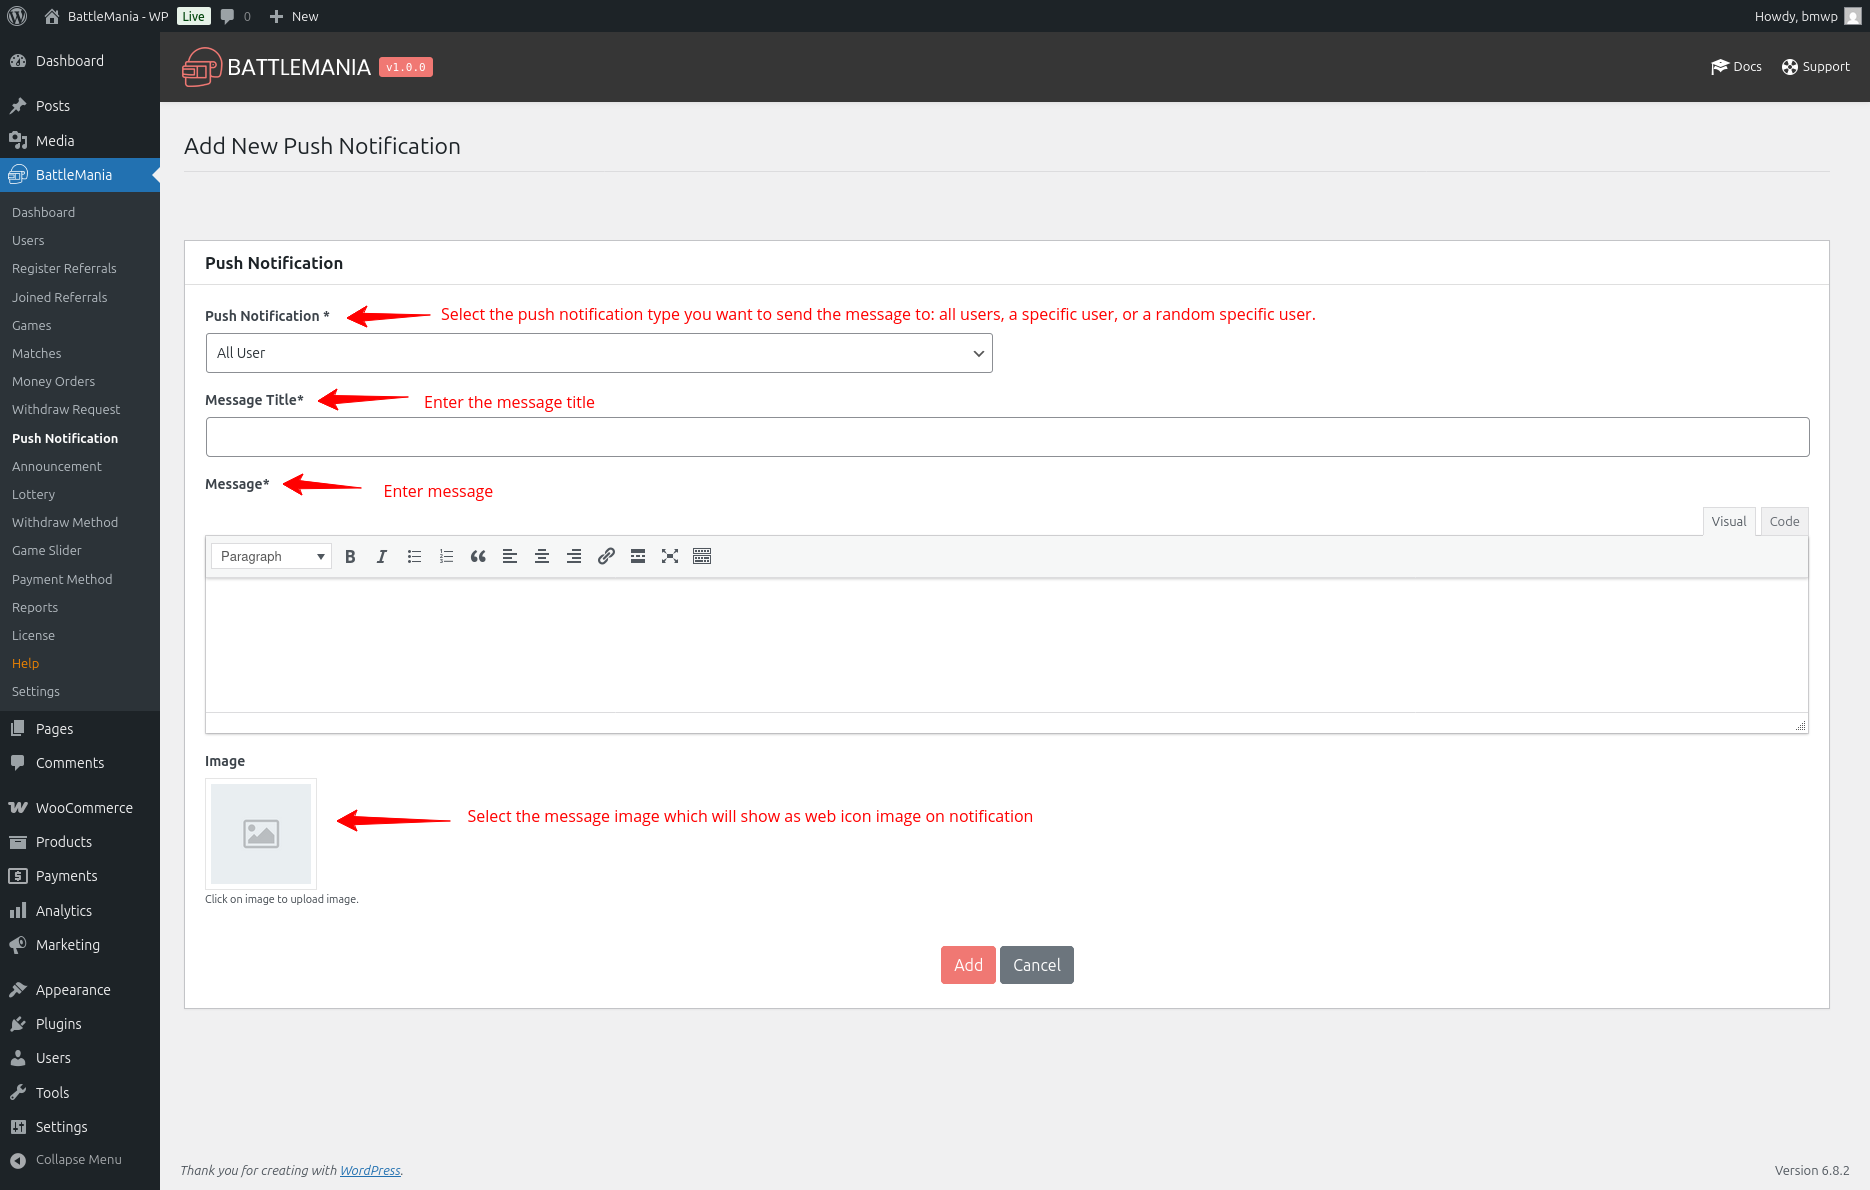
Send custom push notifications to: A single user, All users, A specific range of user. You need OneSignal account to activate push notification. Also, if push notification is active then whenever new match, new lottery and match room id/password will be added, notification will sent to all active users who has active the push notification from there profile.
How to active push notifica
tions in plugin:
1. To active push notification you need OneSignal APP ID & API KEY.
2. Find your App ID under Settings > Keys & IDs in the OneSignal Dashboard.
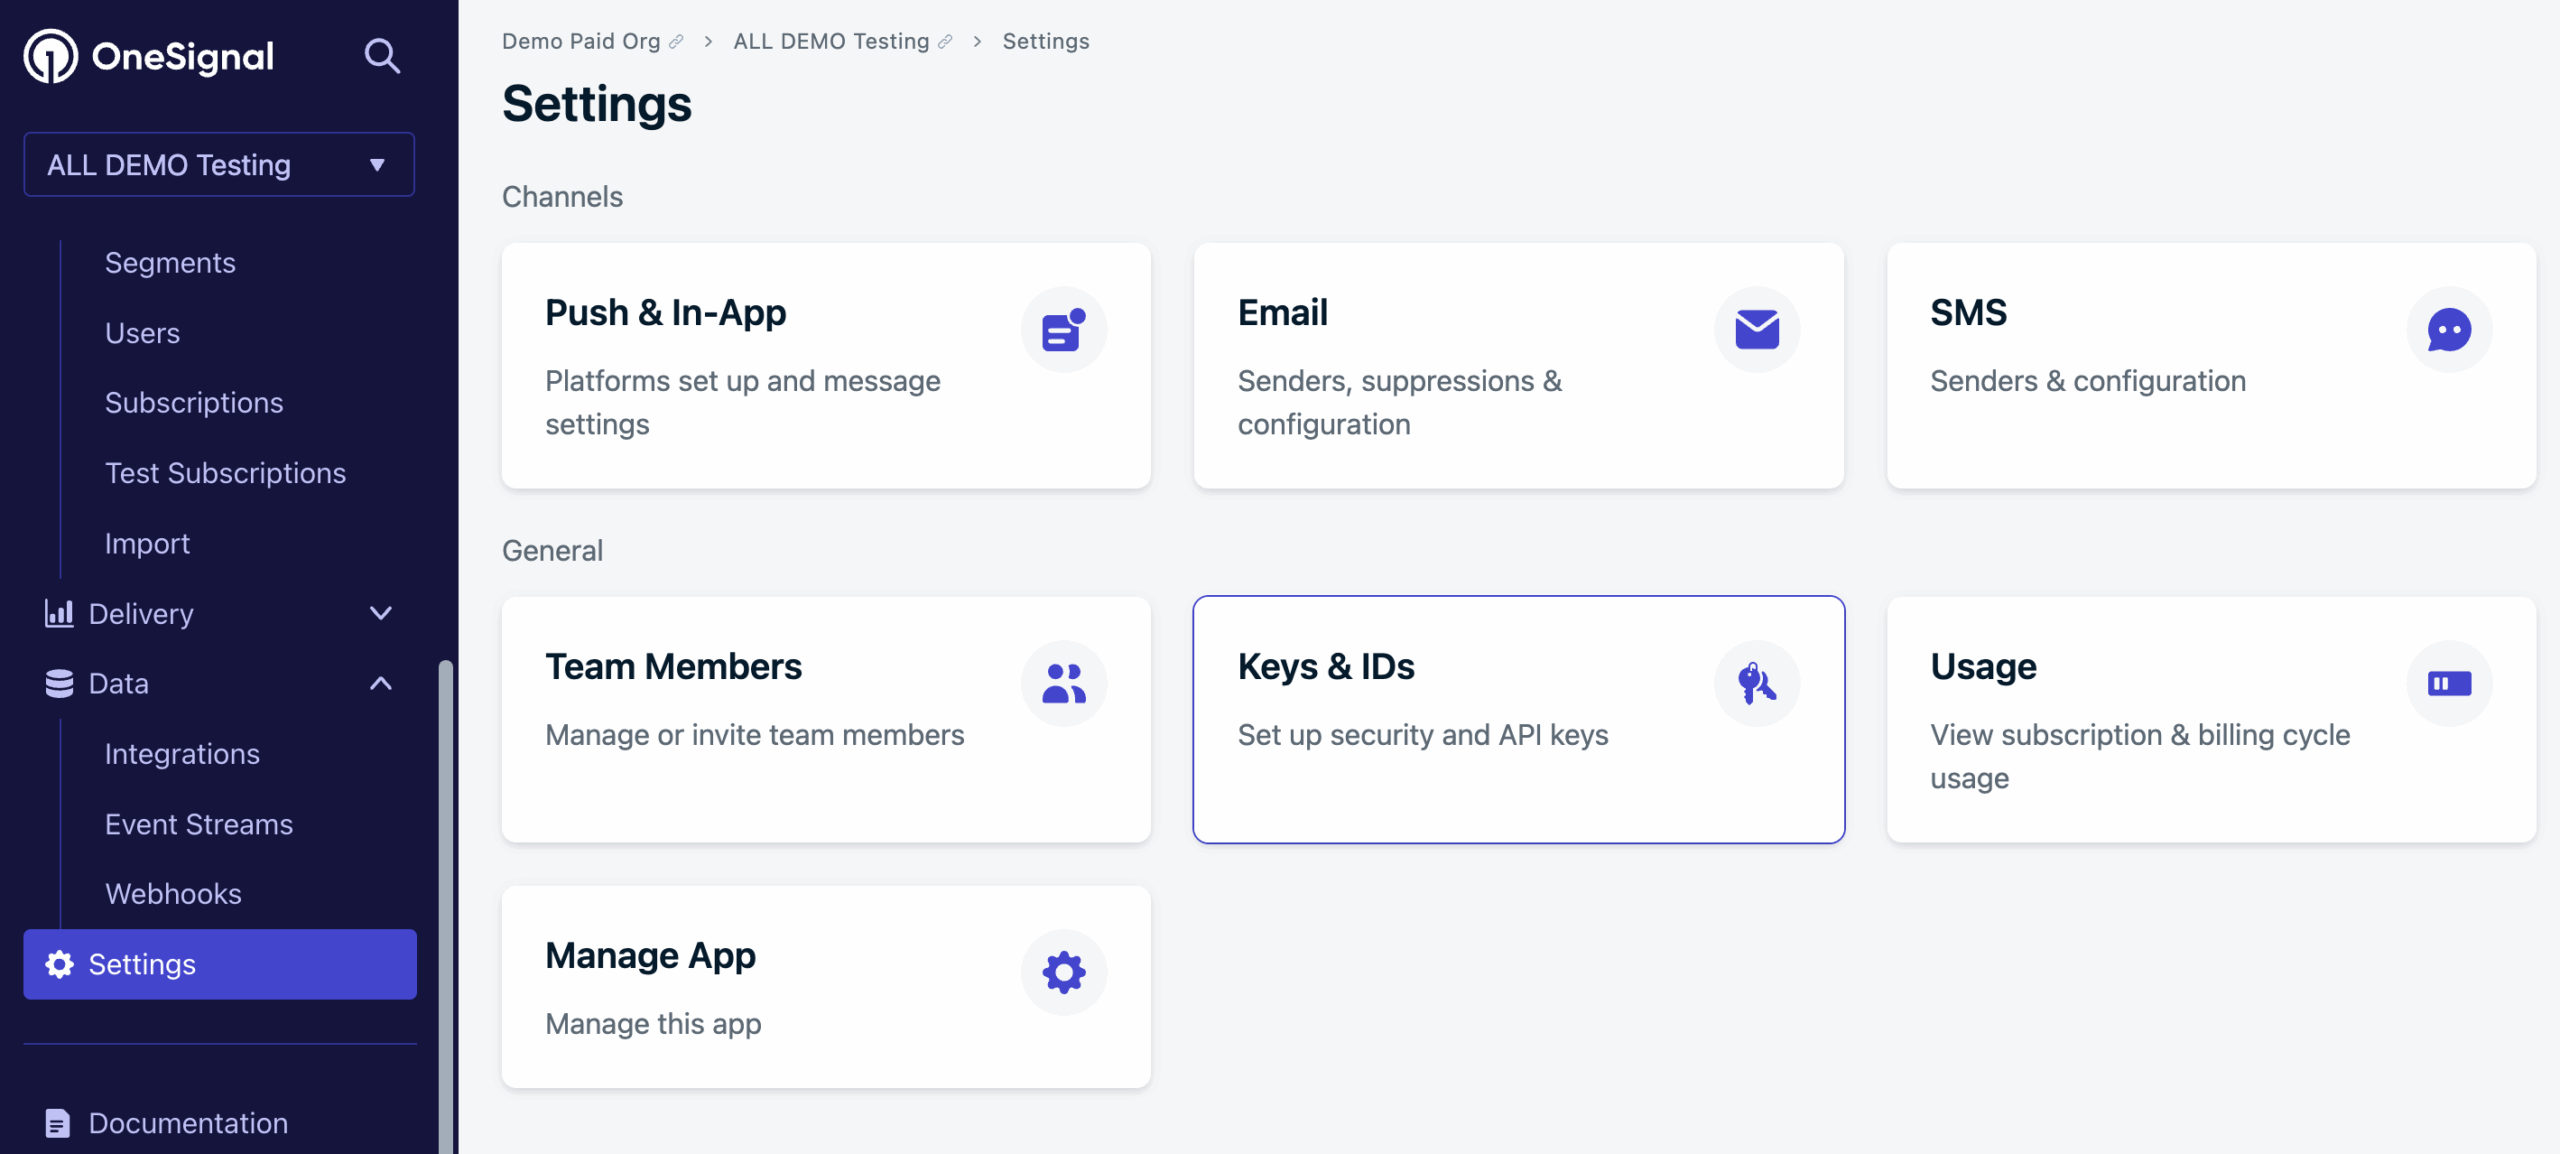
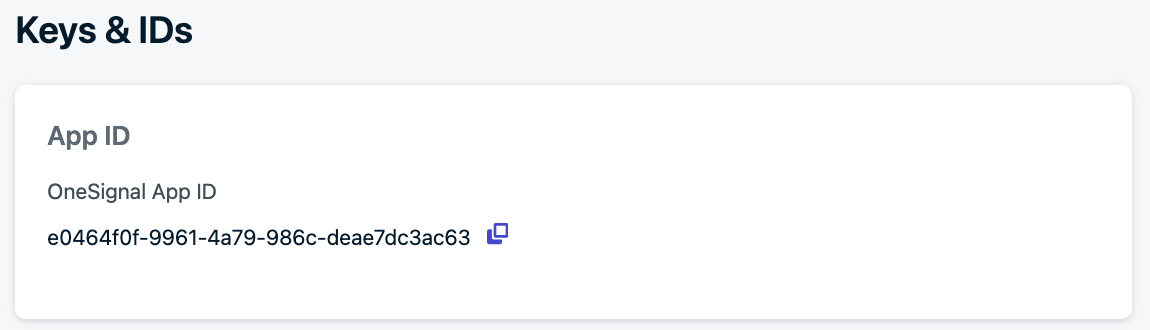
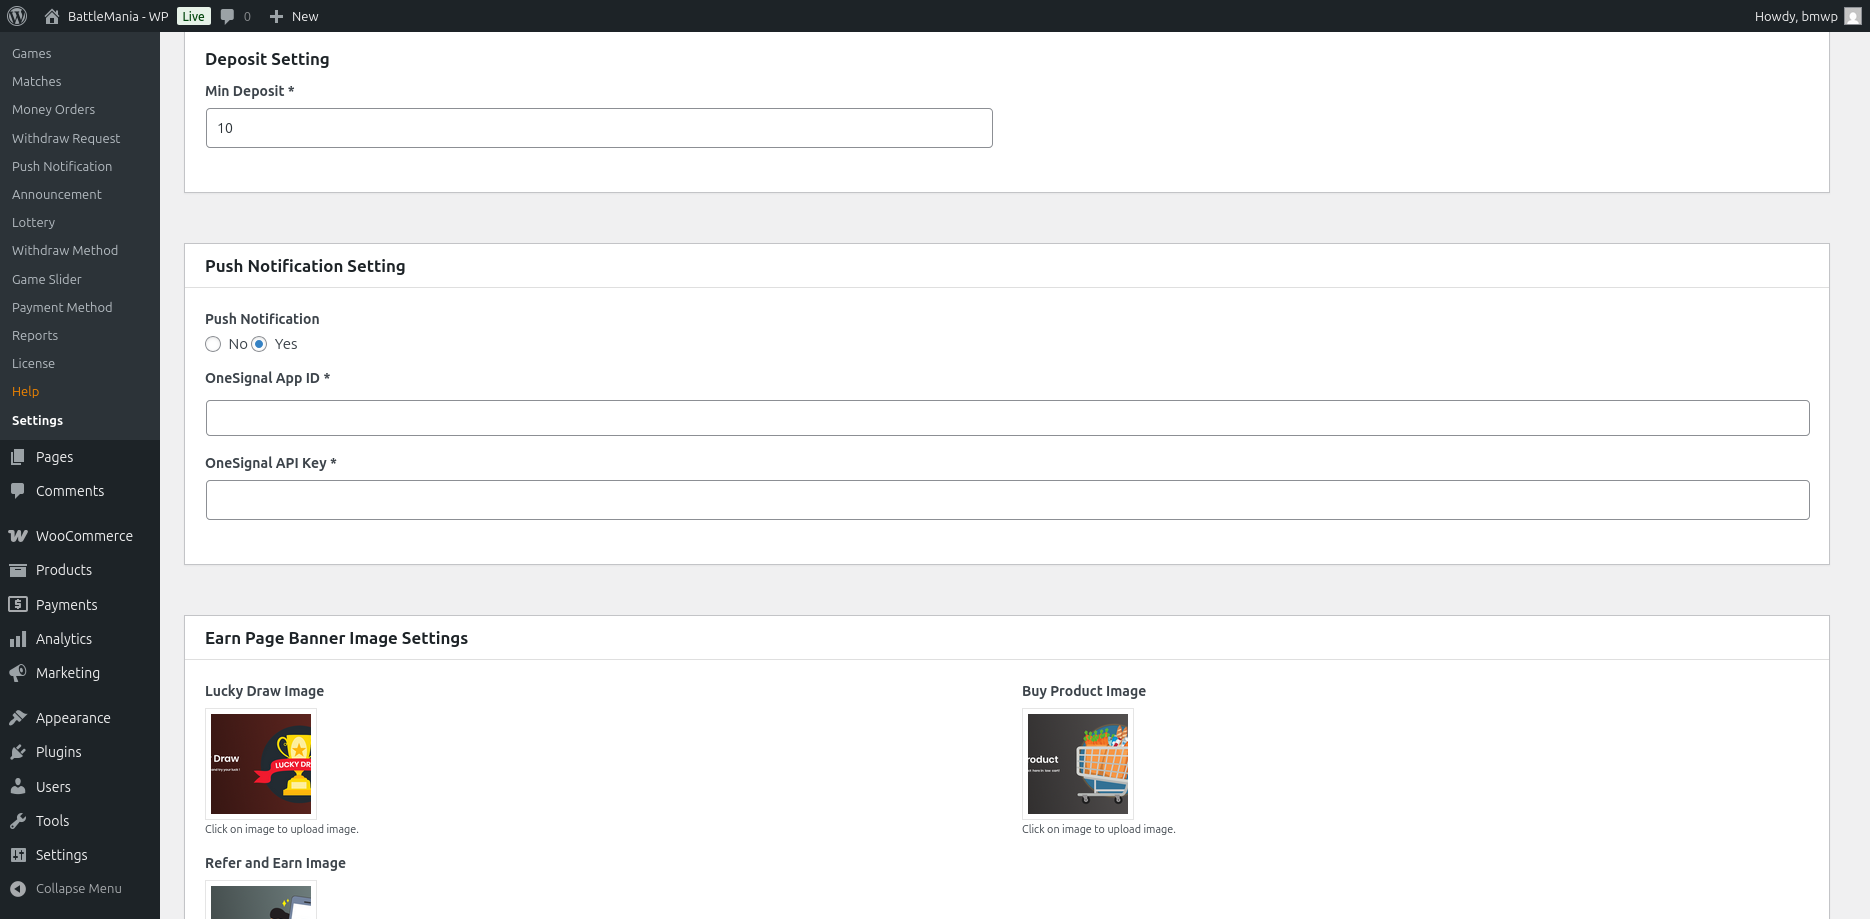
3. Copy App ID. Then go to BattleMania -> Settings menu and find OneSignal App ID field and paste App ID to that field.
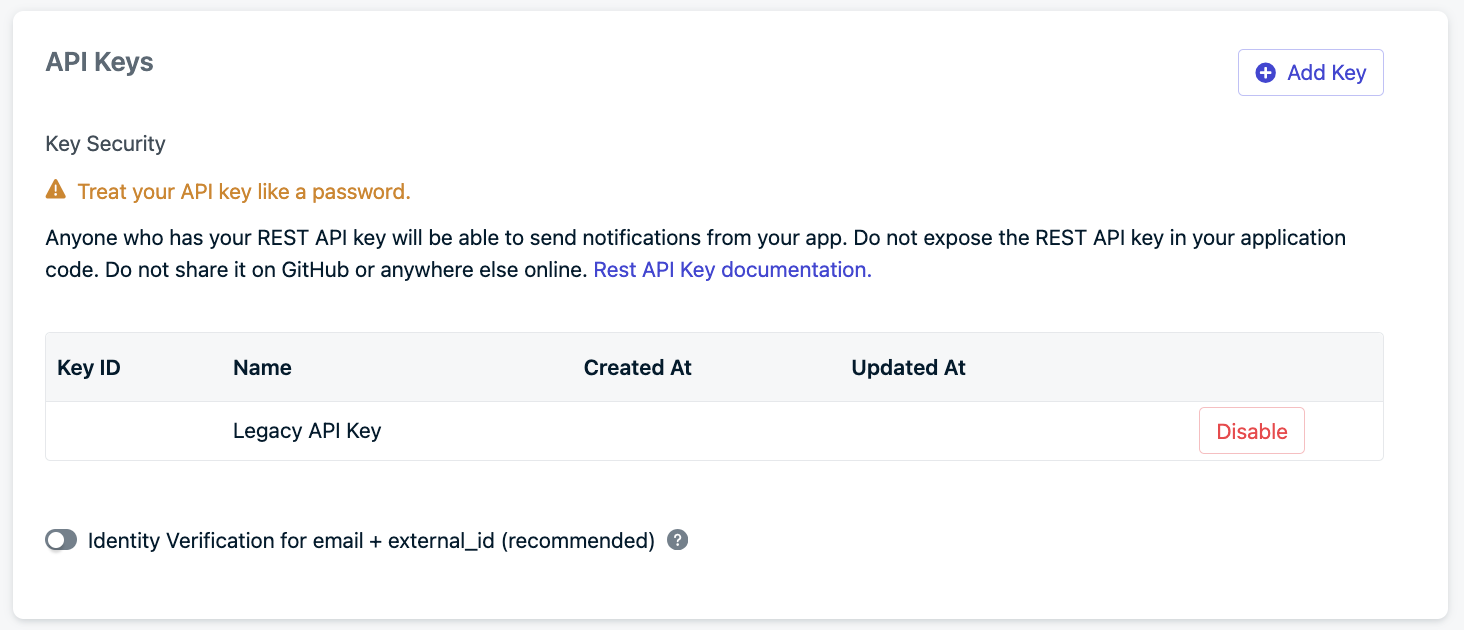
4. For App API Key – Go to your app’s Settings > Keys & IDs. Go to your organization’s Keys & IDs section. Click Add Key to open the creation modal. After clicking Create, your API key will be shown once. Save it securely.
5. After creating a key. Copy the key and go to BattleMania -> Settings menu and find OneSignal API Key field and paste API Key to that field.
6. After adding APP Id & API key, You need to add one js file into your root folder to work onesignal. Create a new file called OneSignalSDKWorker.js and make it public. Copy-paste the ollowing import statement into the file: importScripts("https://cdn.onesignal.com/sdks/web/v16/OneSignalSDK.sw.js");
For more details information, you can review the OneSignal official document here.
https://documentation.onesignal.com/docs/keys-and-ids#create-api-keys
https://documentation.onesignal.com/docs/web-sdk-setup#option-1-create-file-on-server-and-copy-code
How sent push notification to user:
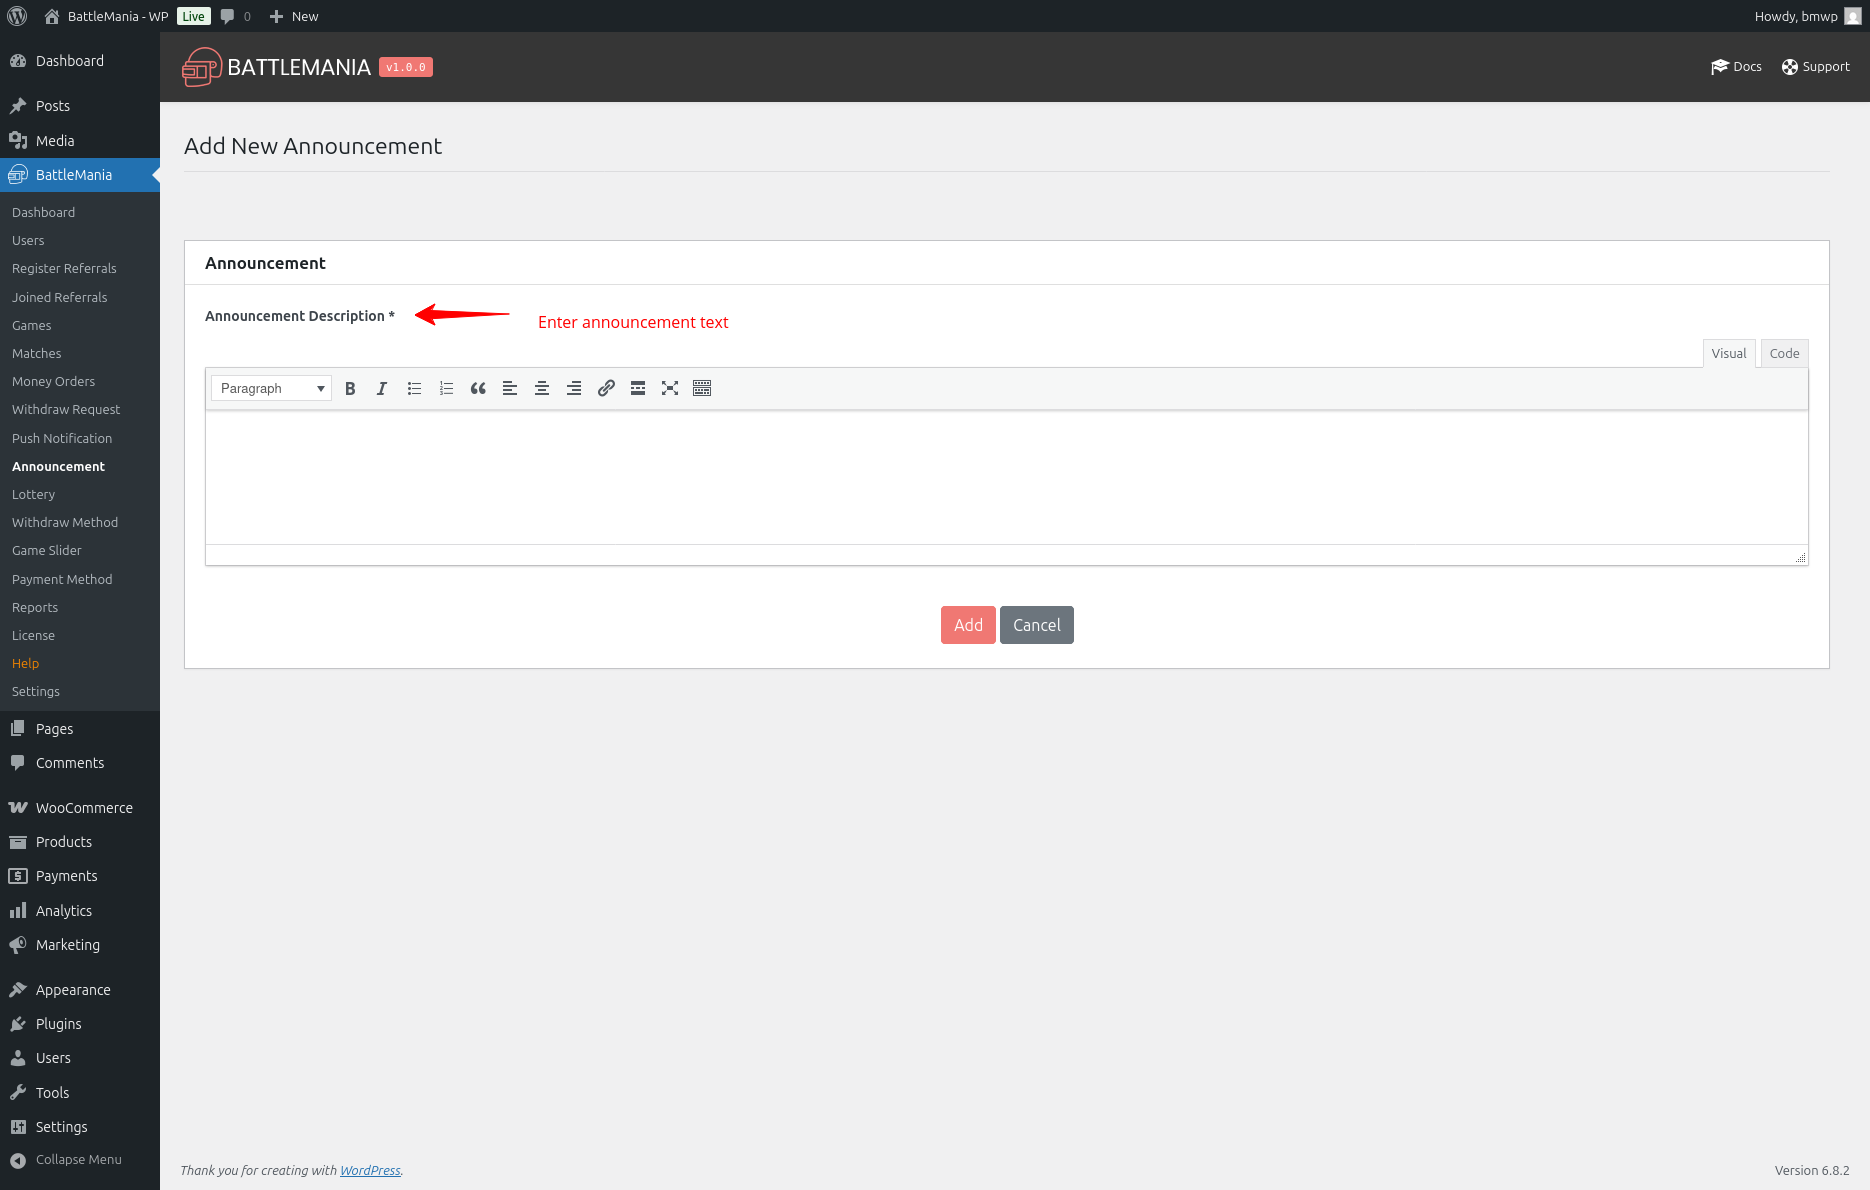
Announcement
Post global announcements that will be visible to all users on their dashboards. Can be used for updates, maintenance notices, or special events.
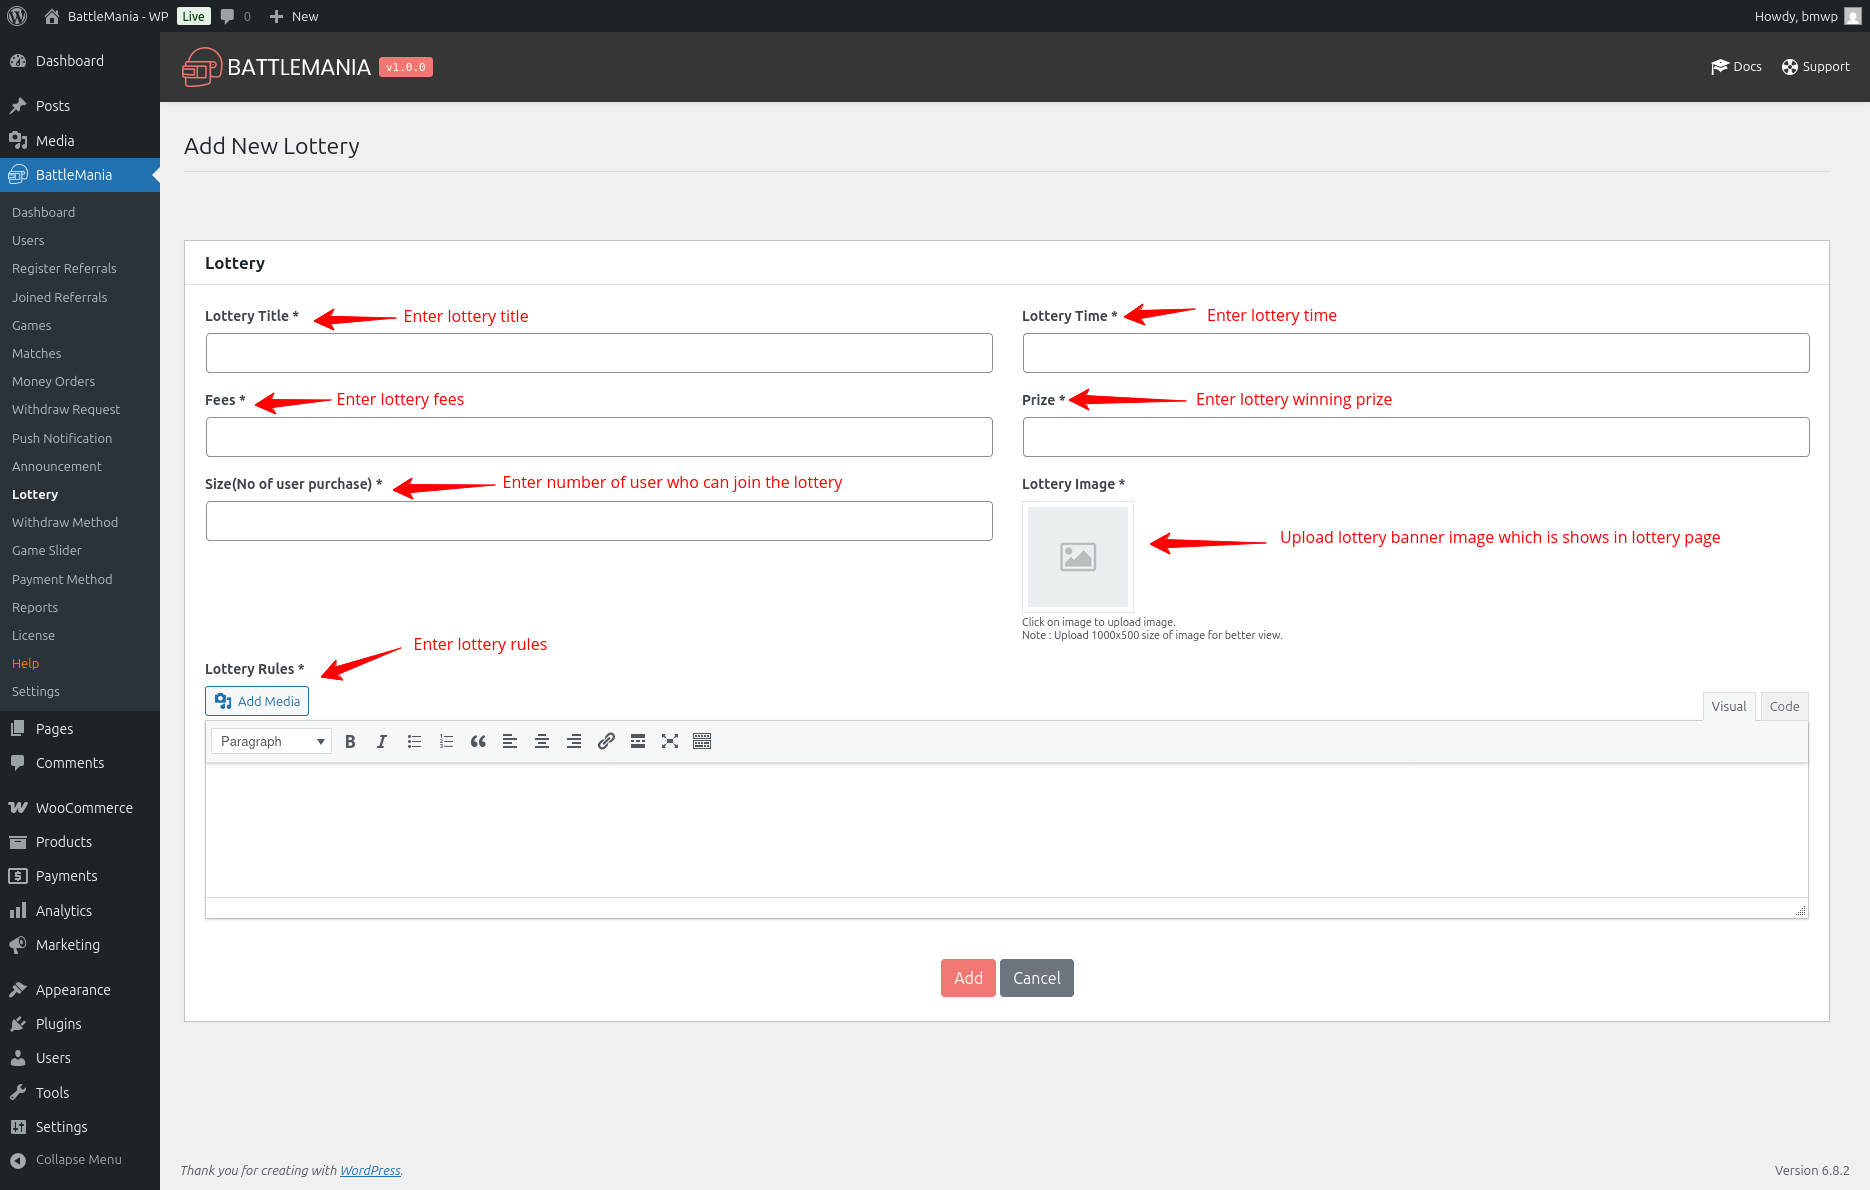
Lottery
Manage lottery draws where all registered users can participate by spending wallet balance or points. Admin can configure the entry amount, time, and winning reward. Winners can be selected manually or randomly by the admin. This feature helps increase user engagement and wallet activity.
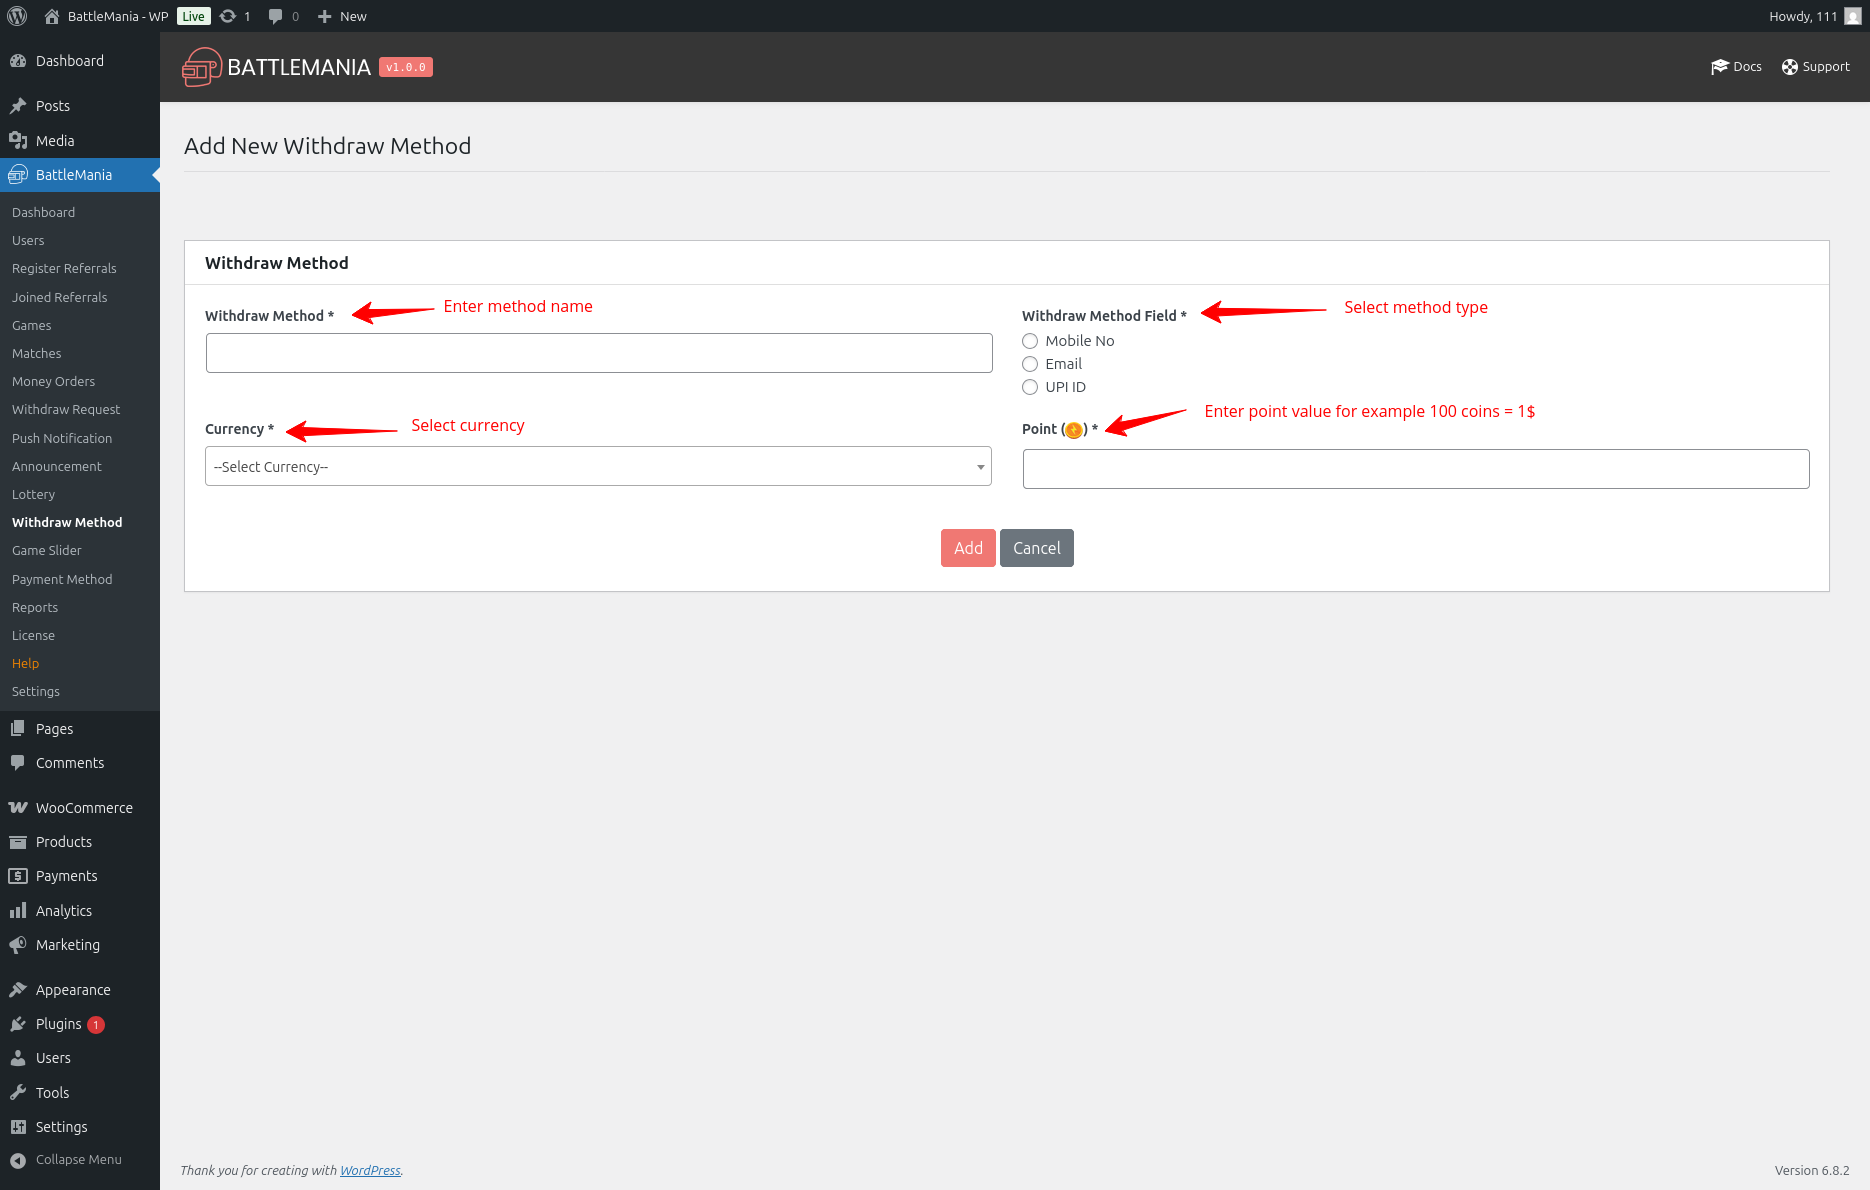
Withdraw Method
Define and manage the withdrawal methods available (like UPI, Email and Phone). You can add new methods and make them active/inactive.
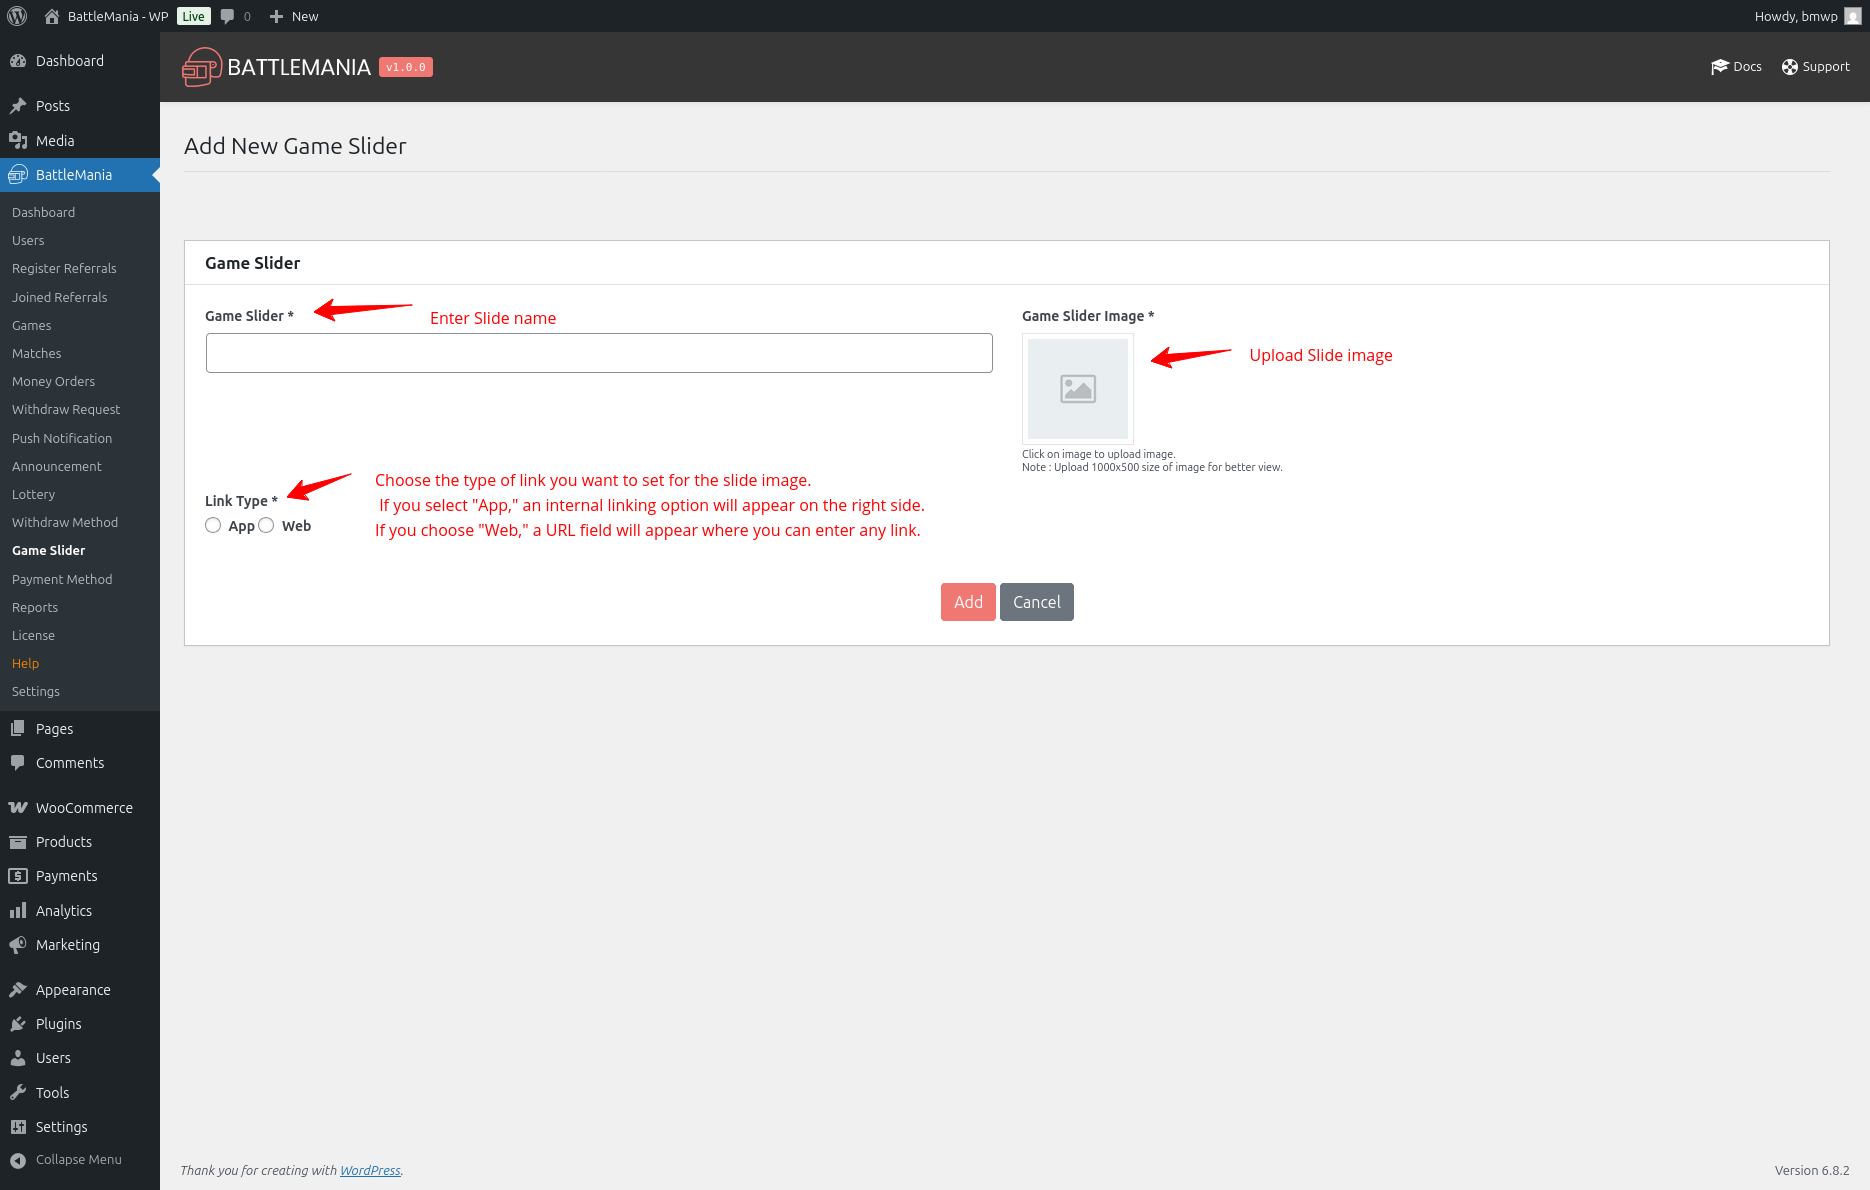
Game Slider
Create and manage image sliders for the frontend dashboard. Use this to highlight promotions, featured games, or upcoming events.
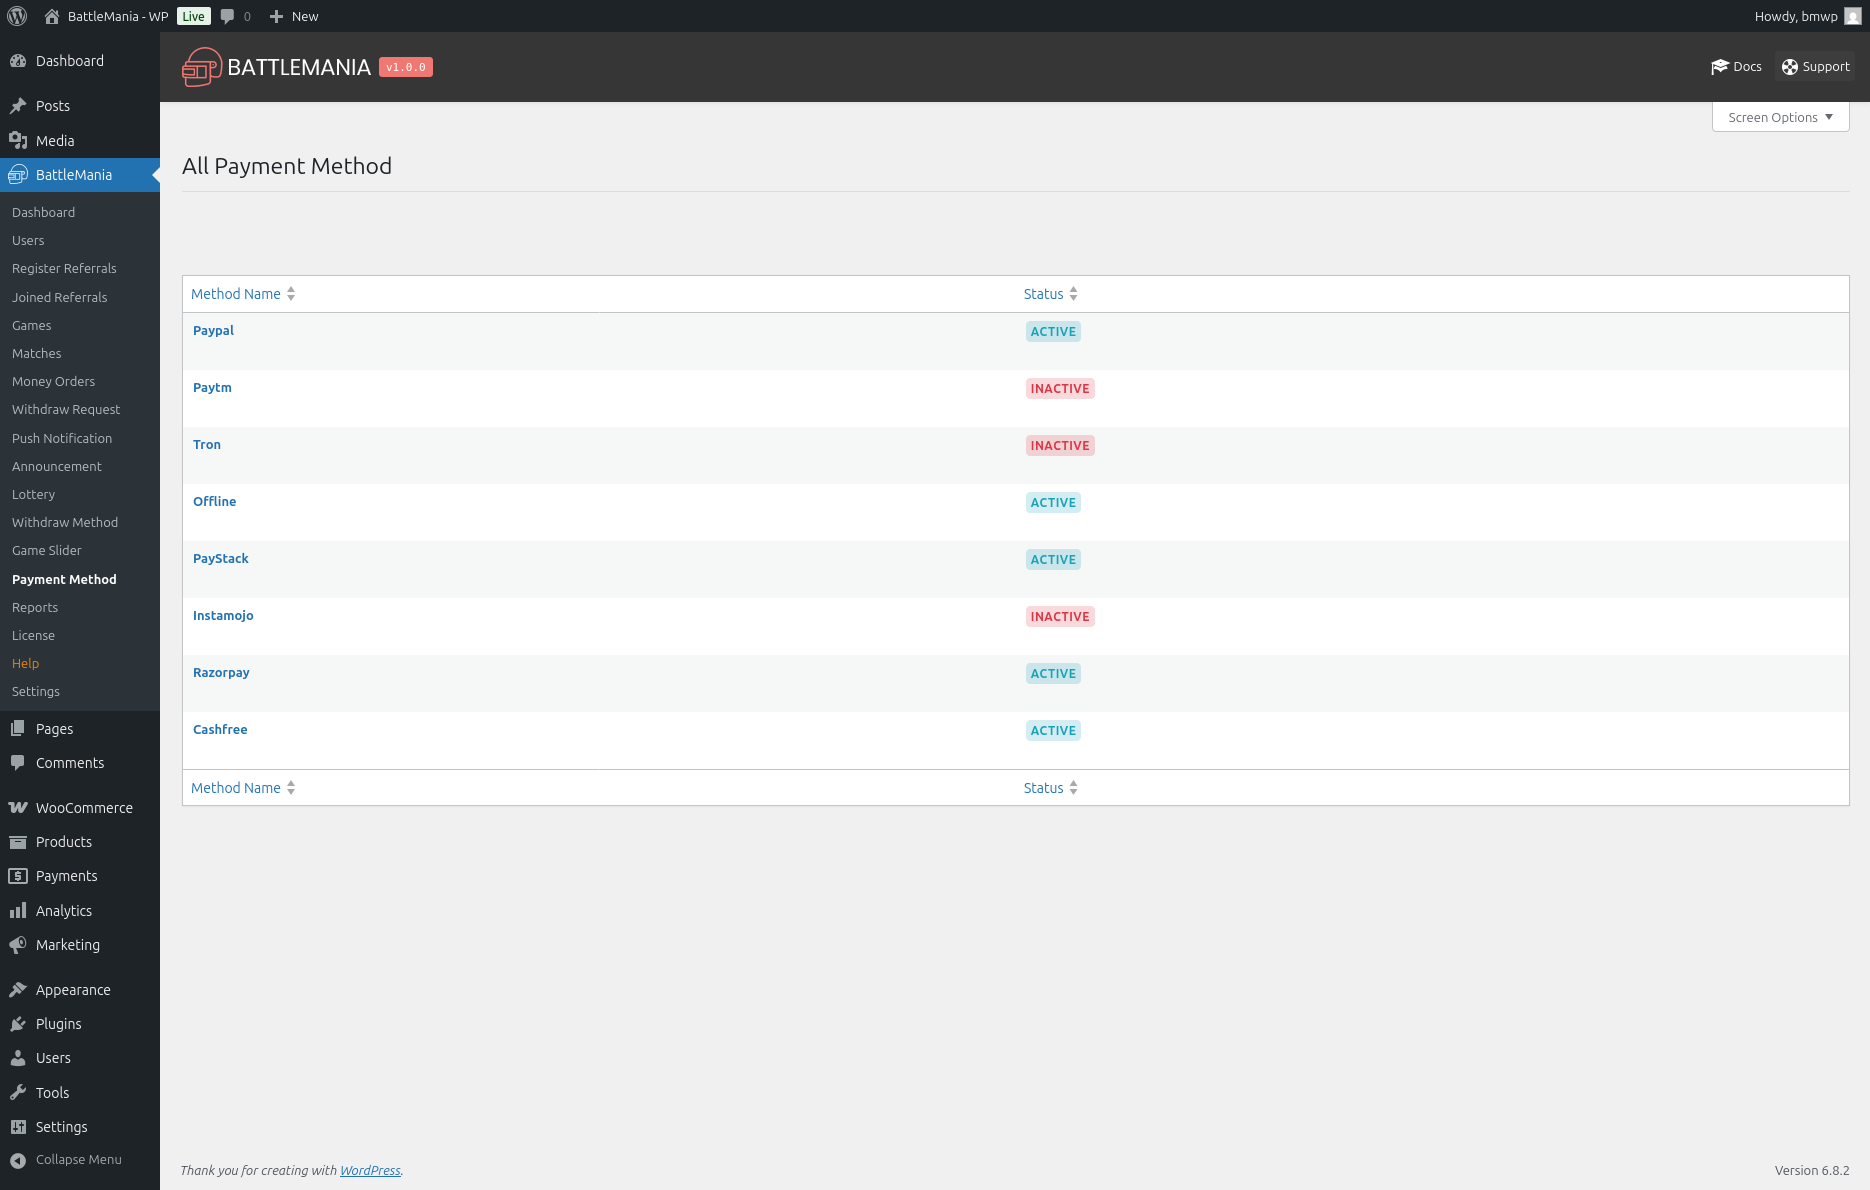
Payment Method
Enable or disable payment gateways like Razorpay, Cashfree, Paystack, Paytm, Instamojo, Tron, and more. Also includes test/live mode switching.
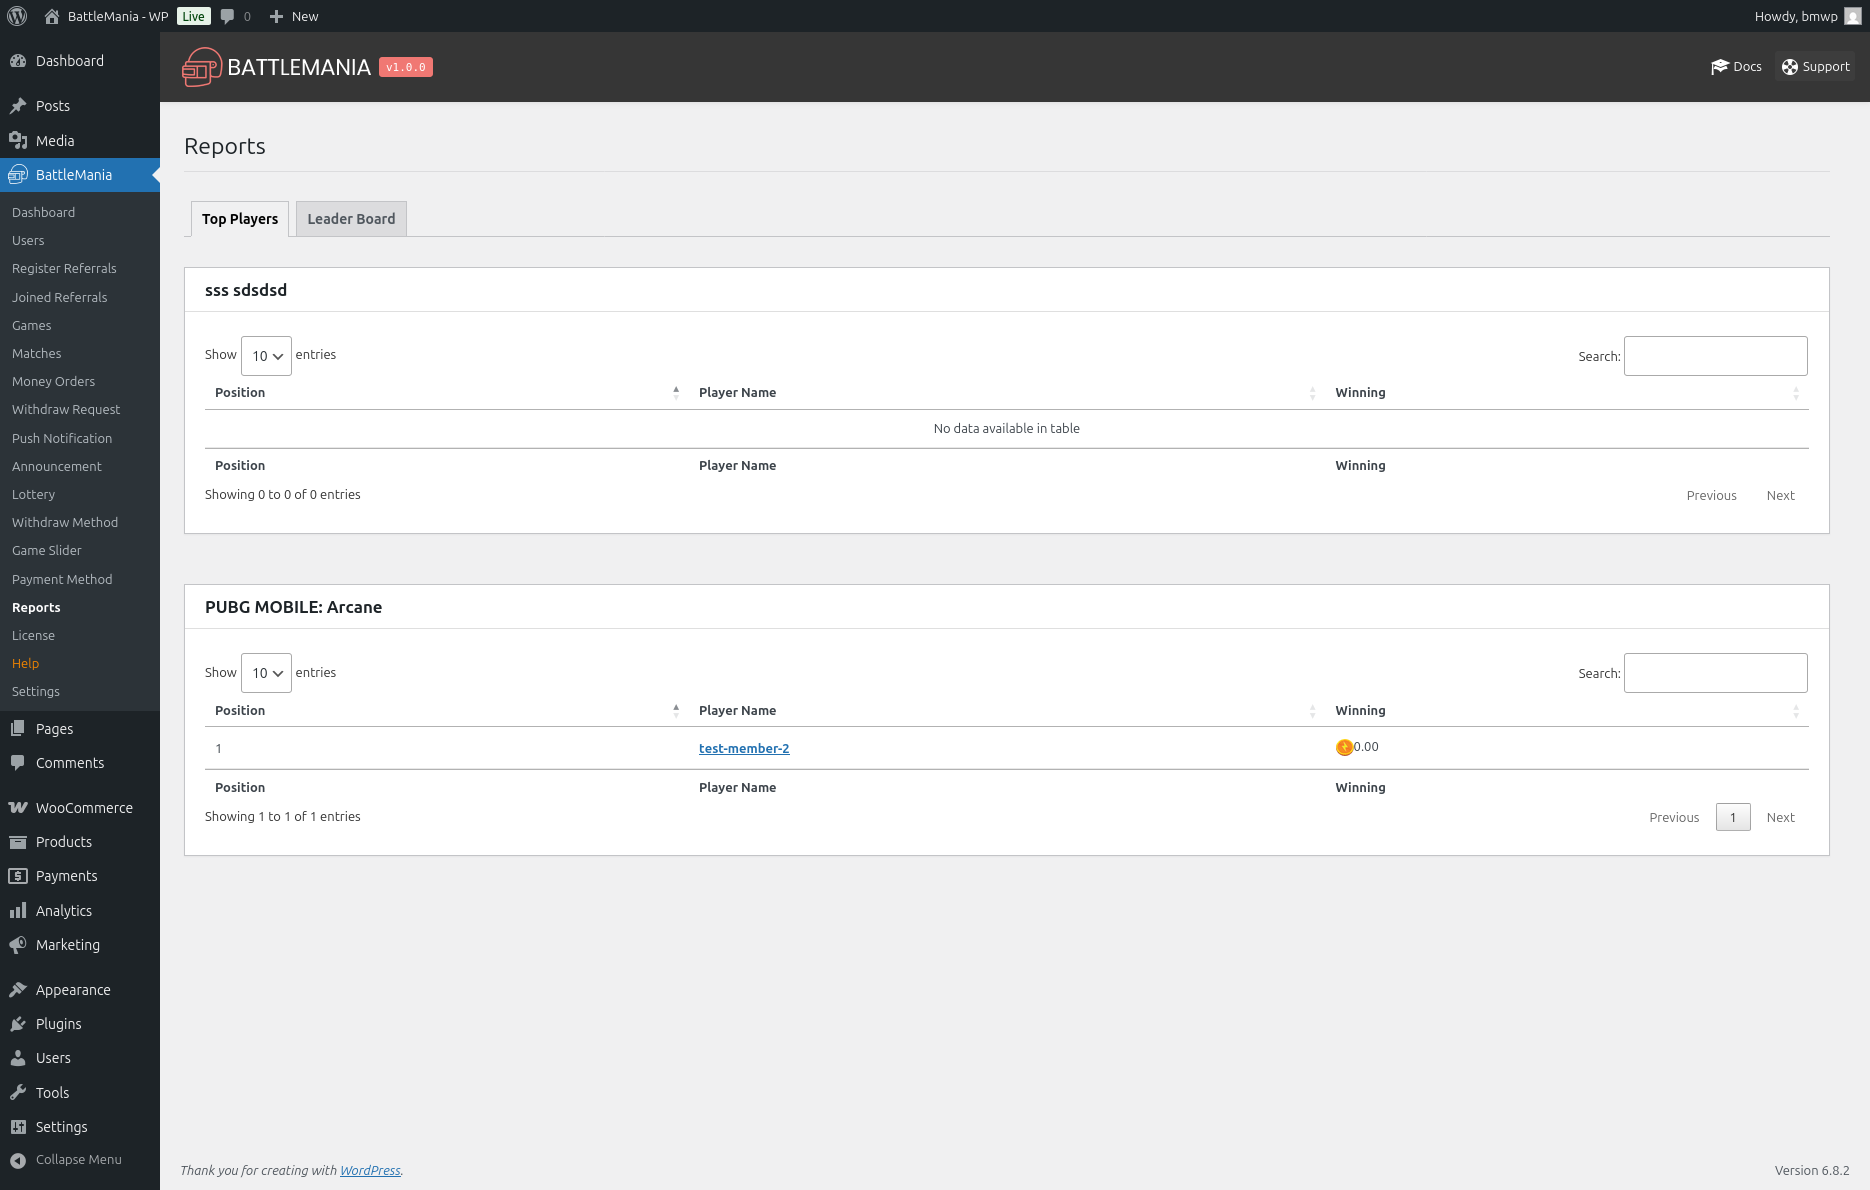
Reports
View comprehensive reports: Top players by games & Leaderboard
Settings
General plugin configuration: OneSignal keys, Currency settings, Admin Commission percentages, Referral settings, Minimum withdrawal amount and other global settings

Where Is My Purchase Code?
Let's do great work together.
Request A Free Quotation!